





 Salesforce ERP
 ERP + CRM Platform
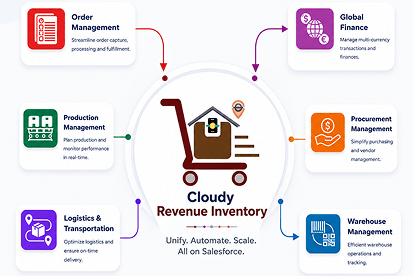
  Inventory Management
  Warehouse Management
  Order Management
  Vendor Management
  Logistics Management
  BOM Management
  Order Fulfillment
  Business Operations
  SaaS Platform for Operations
  Salesforce Cloud ERP Platform
  Xero
Xero
 Zoho books
 Quickbooks
 Shopify
 Acumatica
 SAP
SAP
 Odoo
Odoo
 NetSuite
 Microsoft Dynamics 365
 Sage
Sage



 Agentforce Revenue Management
 Agentforce Revenue Management + Billing
  Salesforce CPQ
 Salesforce Advanced Billing
  Migrate from CPQ to ARM
  Managed Services
 Salesforce Implementation
 Revenue Cloud Implementation
 MuleSoft Integration
 Microsoft
 Data Cloud
 Tableau
 Generate Document Using Classic View
The Generate Document functionality is available in Salesforce Classic View, allowing users to generate documents directly from a target object record.
Document templates are created and configured using Salesforce Lightning Experience. Once the templates are configured and activated, users can generate documents from Salesforce Classic View. To See how to configure the document template see the Document Template Creation.
If a document template contains configured Signers, the generated document can be sent for signature. If no Signers are configured, the document can be generated, previewed, and downloaded directly.
Switch to Salesforce Classic View
To access the Generate Document functionality in Salesforce Classic:
1.Click the Profile icon.
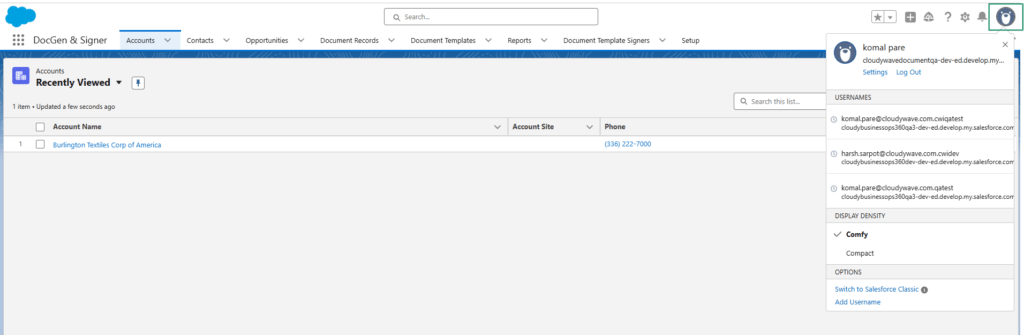
2.Select Switch to Salesforce Classic.
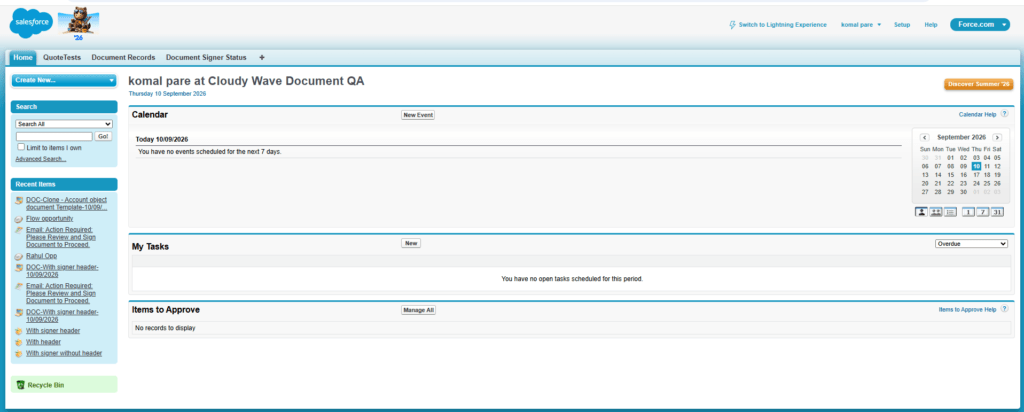
3.Salesforce Classic View will open.
Configure the Generate Document Button
The Generate Document button must be added to the required target object’s page layout before users can generate documents from Classic View.
Steps to add button to Page Layout
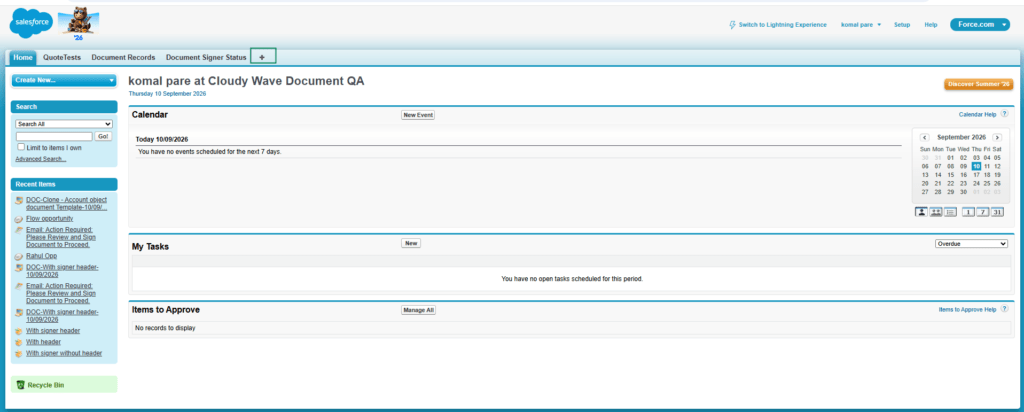
1.Click on + icon
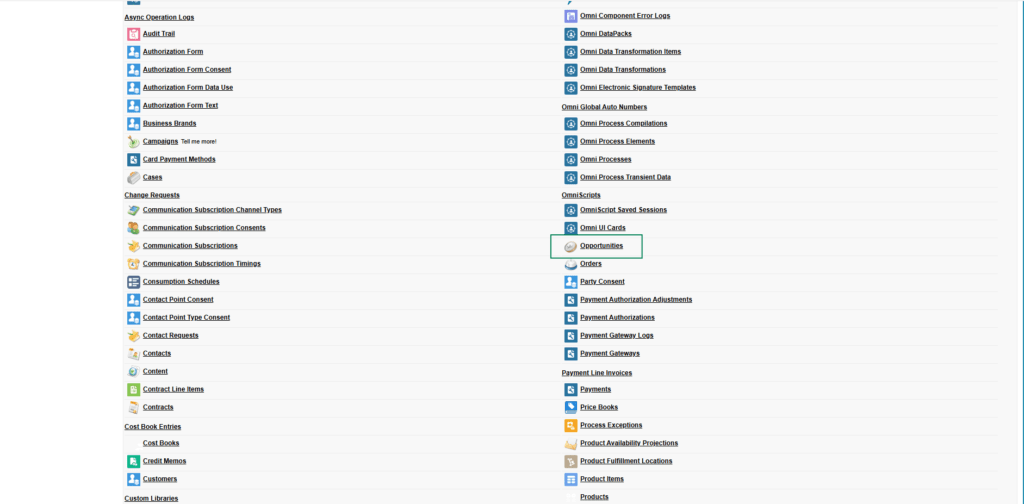
2.Select the required Target Object for which documents need to be generated.
3.Select or create the target object record.
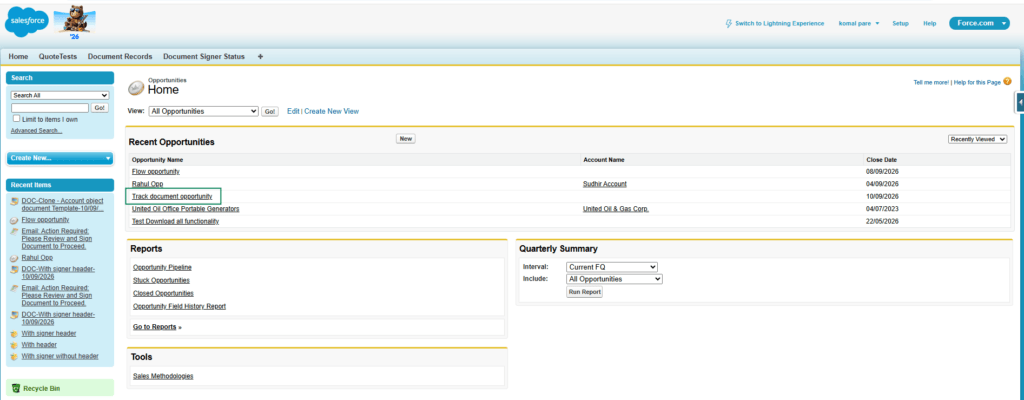
4.Click on the Edit Layout button.
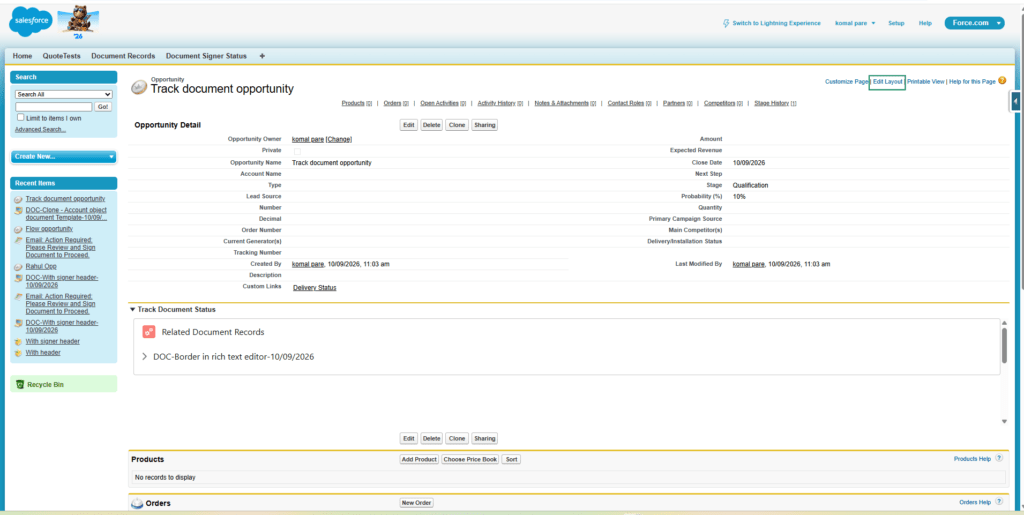
5. Select the required page layout.
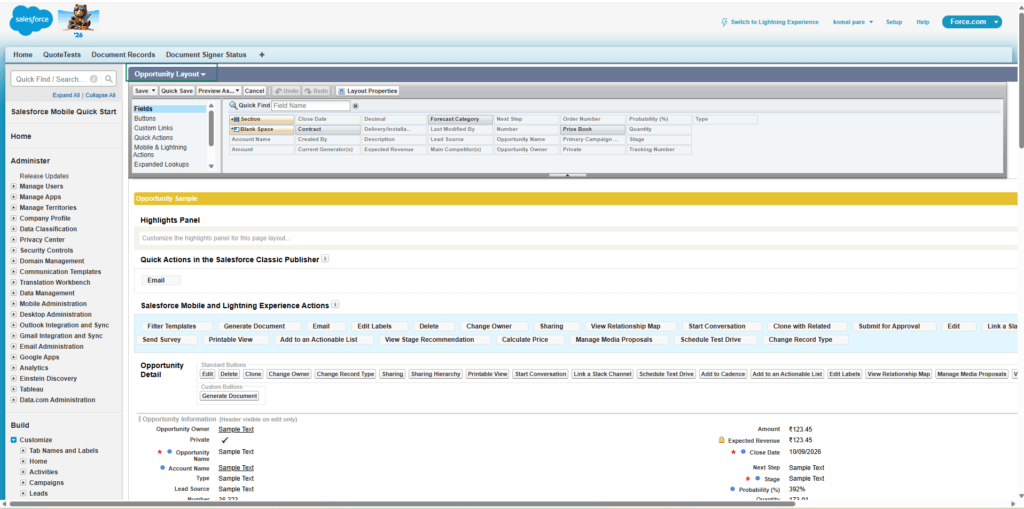
6.Navigate to the Buttons section.
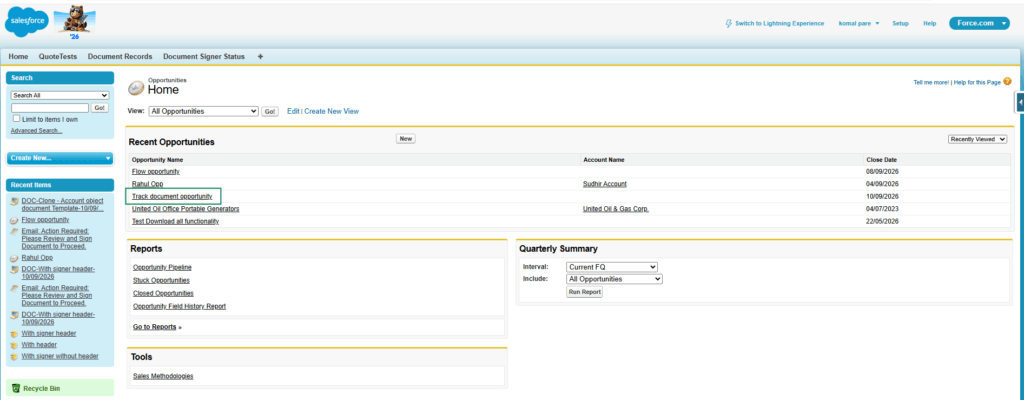
7.Locate the Generate Document button.
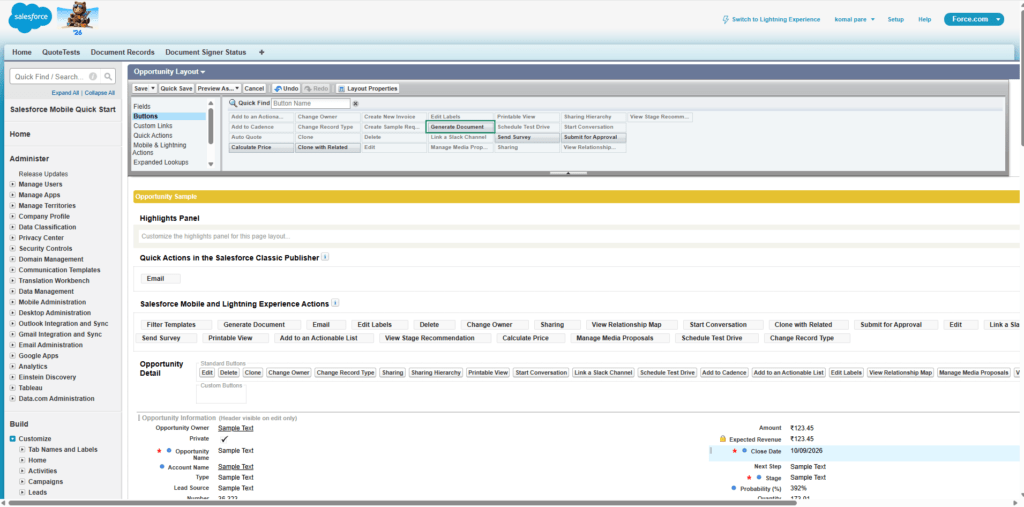
8.Drag and drop the Generate Document button into the Custom Buttons section under the appropriate detail page area.
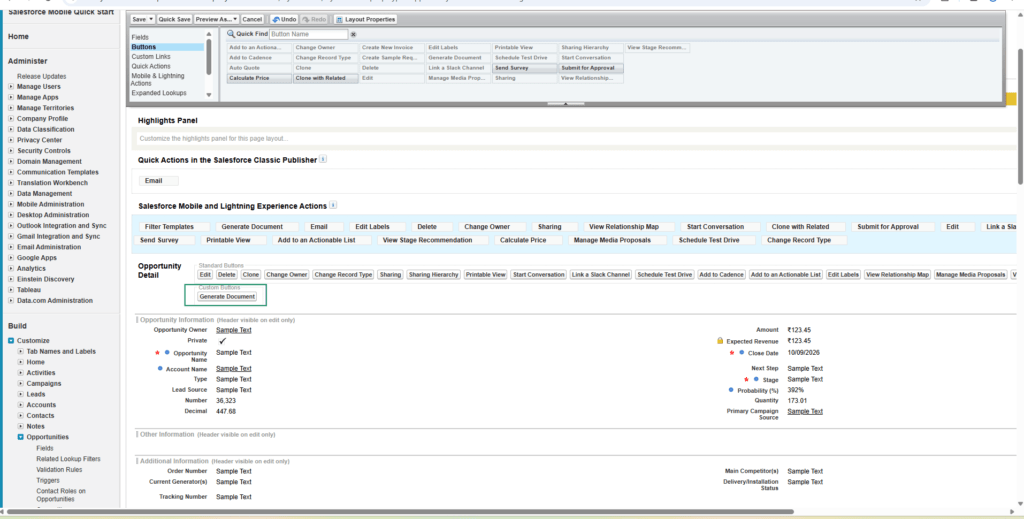
9.Click Save.
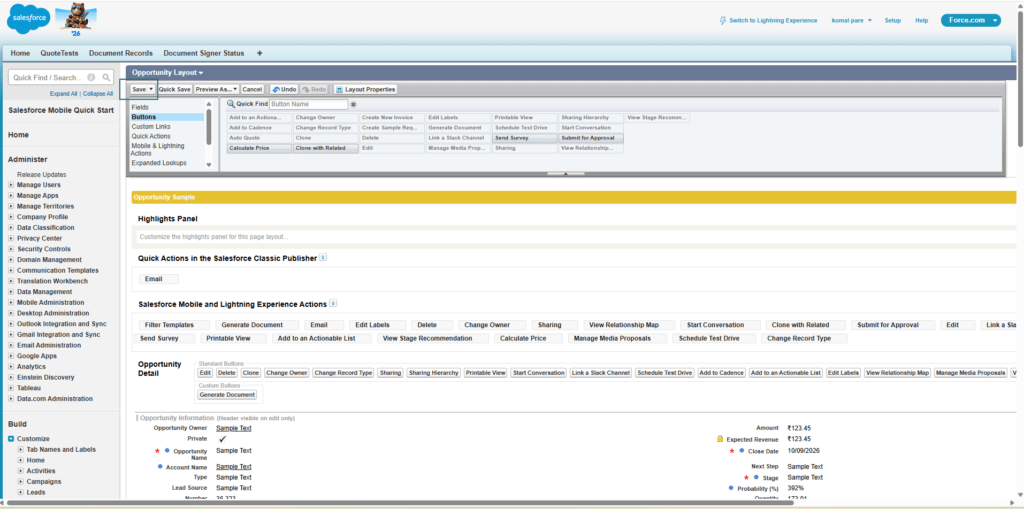
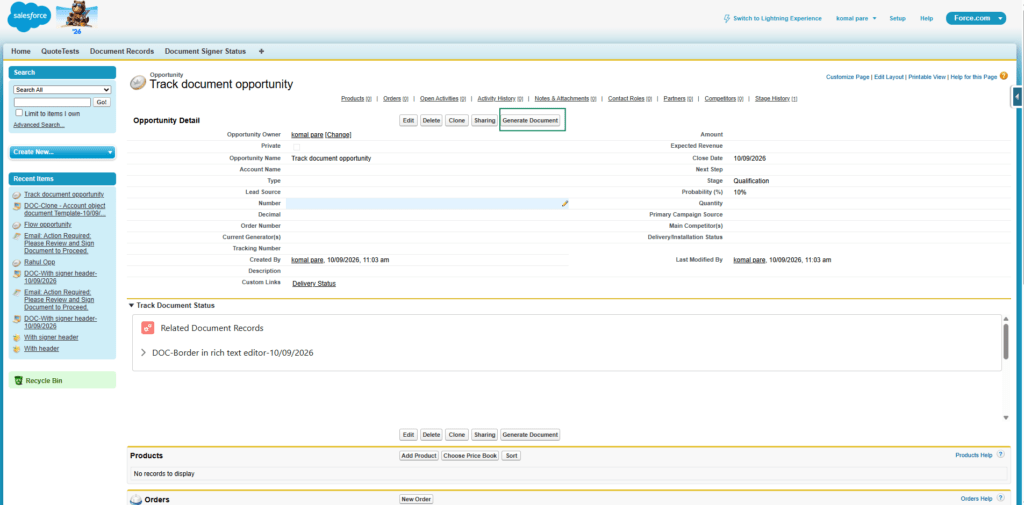
Once configured, the Generate Document button will be available on the selected target object’s record page.
Generate a Document
After the Generate Document button has been added to the page layout, users can generate documents from the target object record.
Steps Generate document from Classic View
1.Navigate to the required Target Object.
2.Open the required target object record.
Example: Open an Opportunity record.
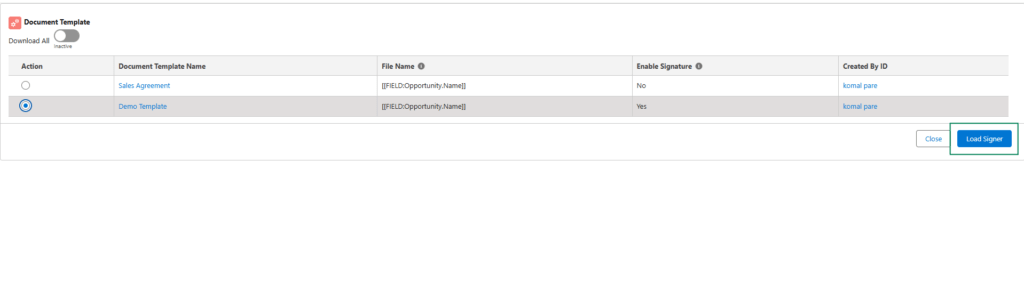
3.Click Generate Document.
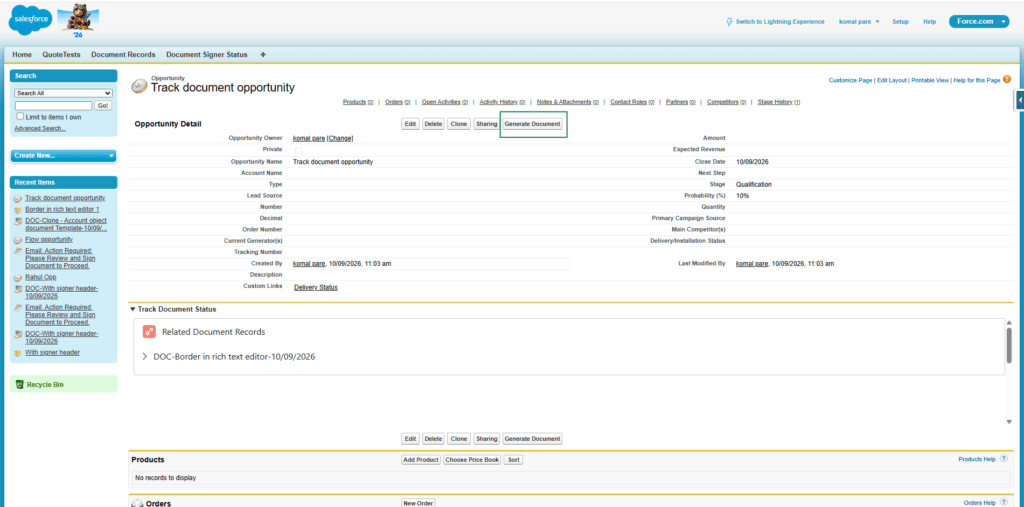
4.The system displays the available active document templates.
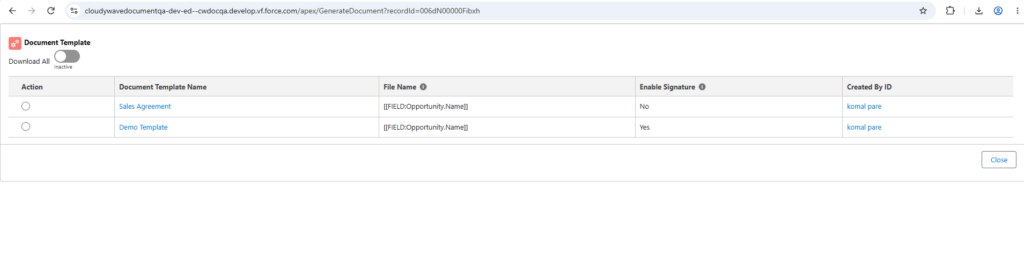
5.Select the document template that you want to generate.
- If the selected document template has Signers configured, you can send the document by email for signature by clicking on the Load Signer button.
- If the selected document template does not have any Signers, you can preview and download the generated document directly.
6.Click on Send Email.

Note: The document template must be active before it is available for document generation.
Track Signer Status on Document Record
The Document Signer Status section allows users to view the current status of a document sent for signature.
To display the signer status in Salesforce Classic, the required Visualforce page must be added to the Document Signer page layout.
Steps to Configure Document Signer Status
1.Navigate to a generated Document record.
2.Click Edit Layout.
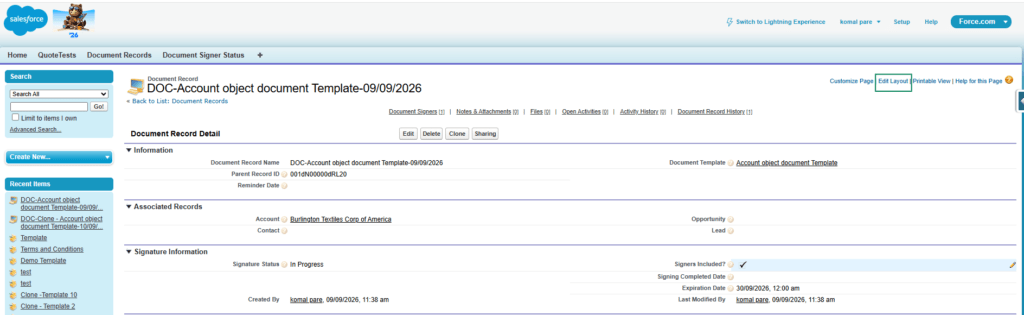
3.Navigate to the Visualforce Pages section.
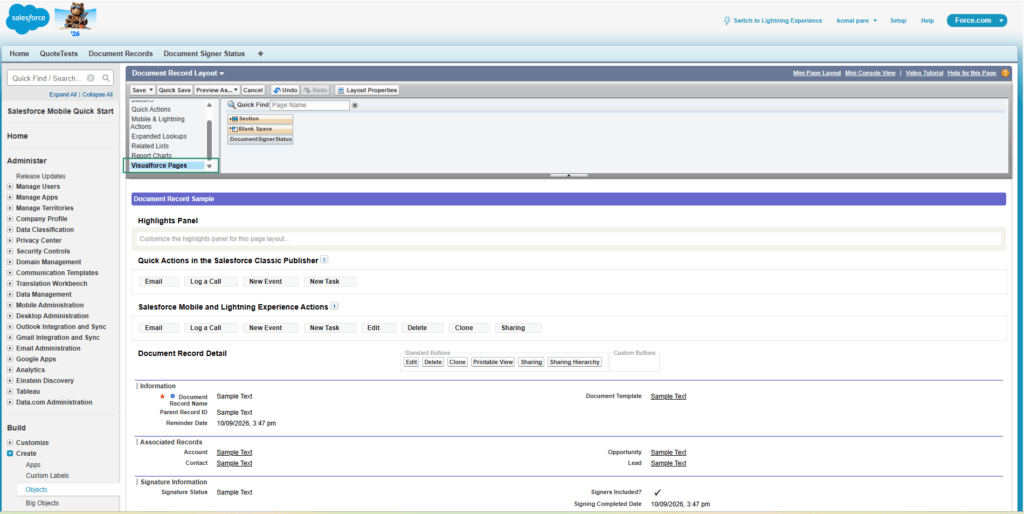
4.Drag and drop the Document Signer Status Visualforce page onto the page layout.
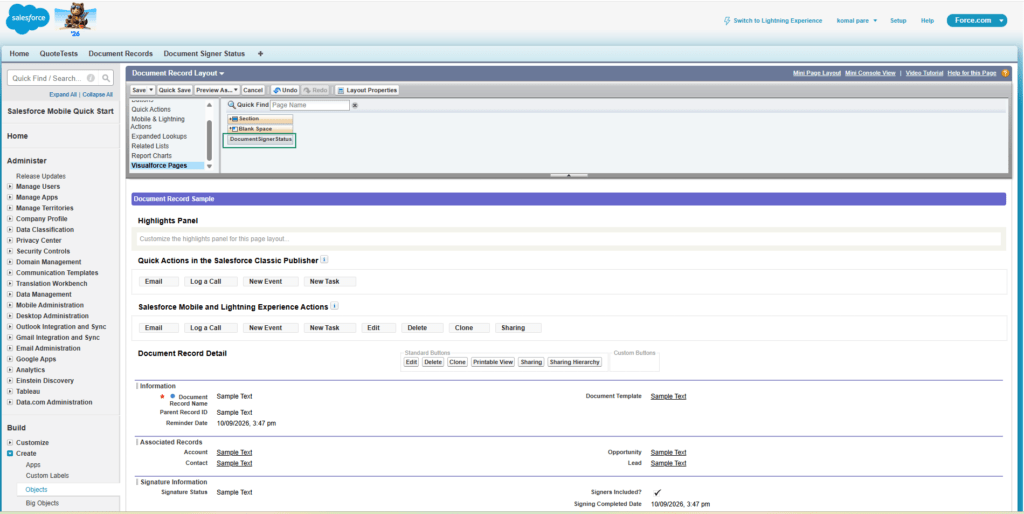
5.Click Save.
After the Visualforce page has been added:
1.Navigate to the relevant Document record.
2.Locate the Document Signer Status section.
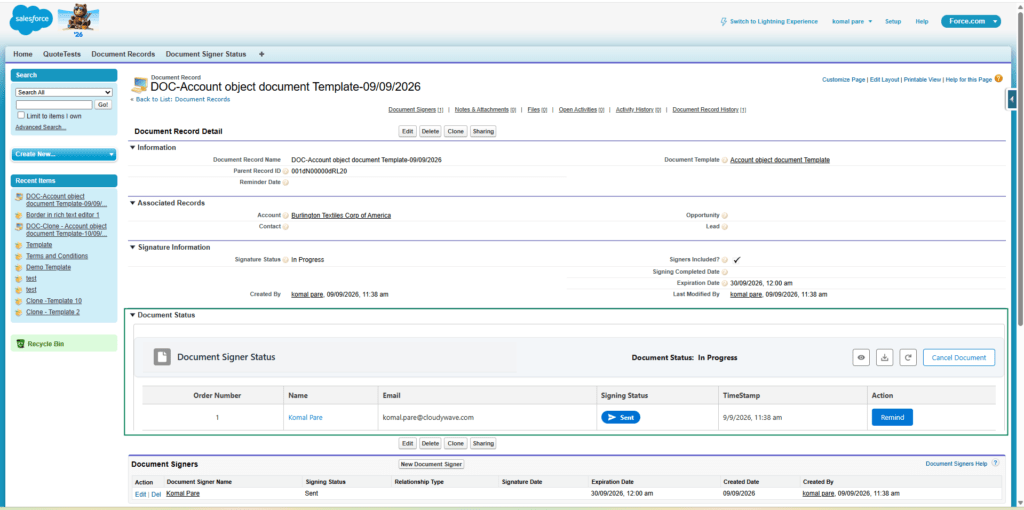
3.Review the current status of the document signer.
This allows users to track the progress of the document signature process.
Prerequisites to Configure Document Tracking on Target Object
Before configuring Document Tracking on a target object, the user must create a Visualforce page and configure it with the required code and target object.
Create a Visualforce Page
Follow the steps below to create and configure the Visualforce page:
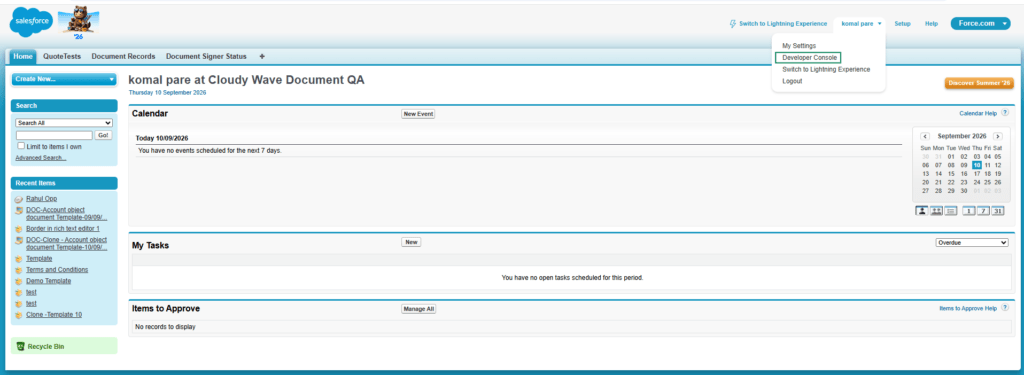
1.Click your user name.
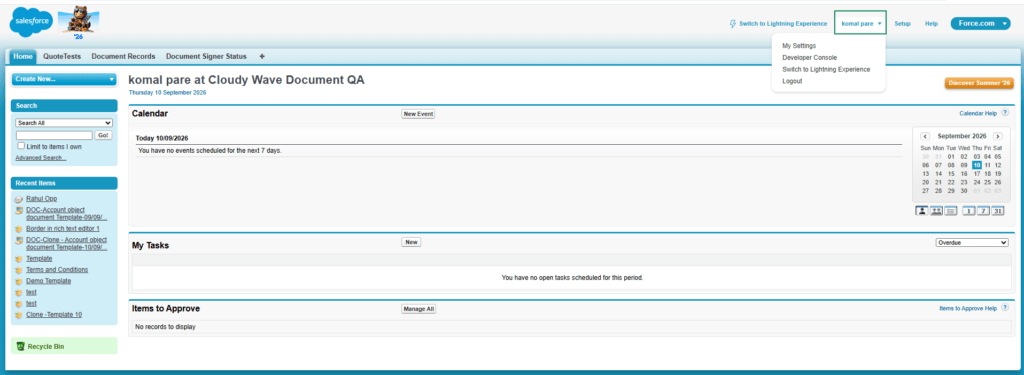
2.Select Developer Console.
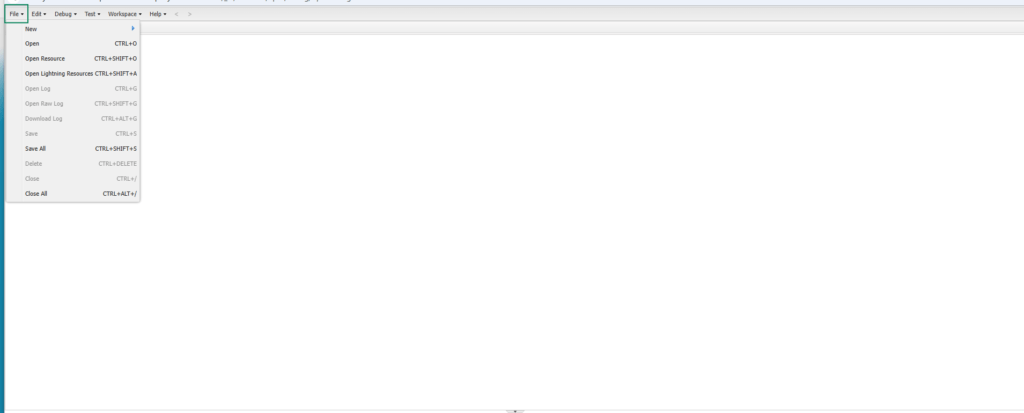
3.In the Developer Console, click File.
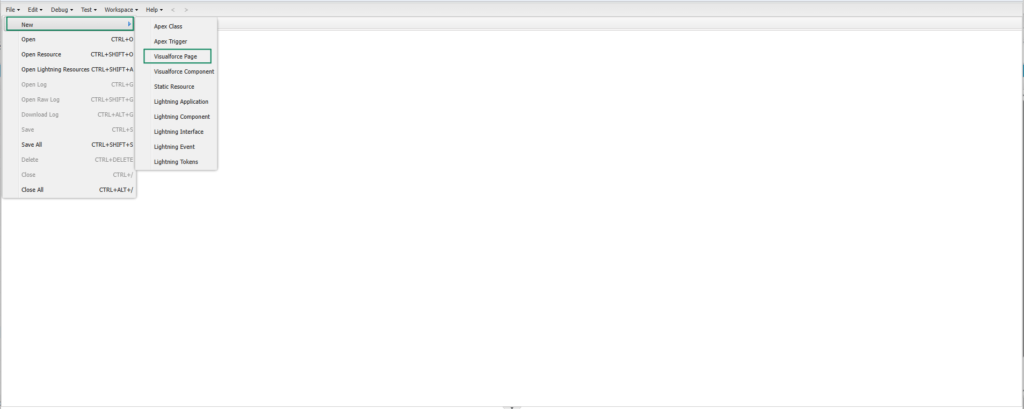
3.Select New → Visualforce Page.
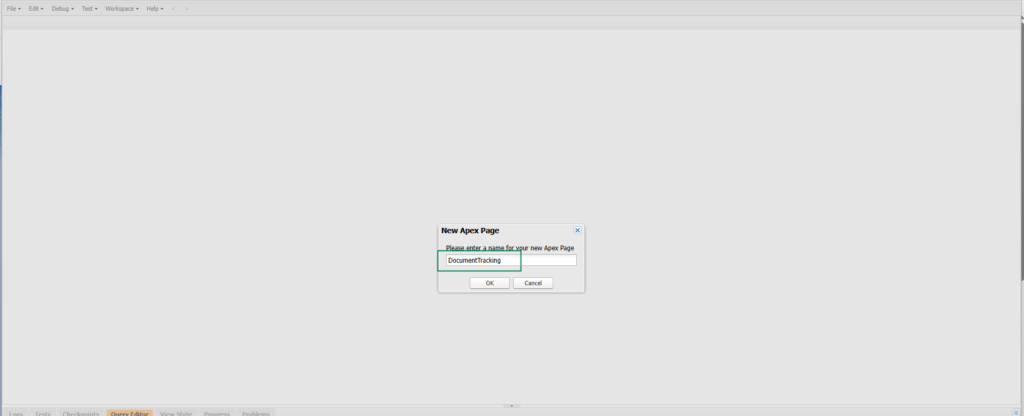
4.Enter a name for the Visualforce page and click on Ok.
5.Copy the provided Visualforce code and Paste the code into the Visualforce page.
The provided Visualforce code is configured for the Opportunity object by default. If you want to use Document Tracking for a different target object, replace Opportunity with the required object name.
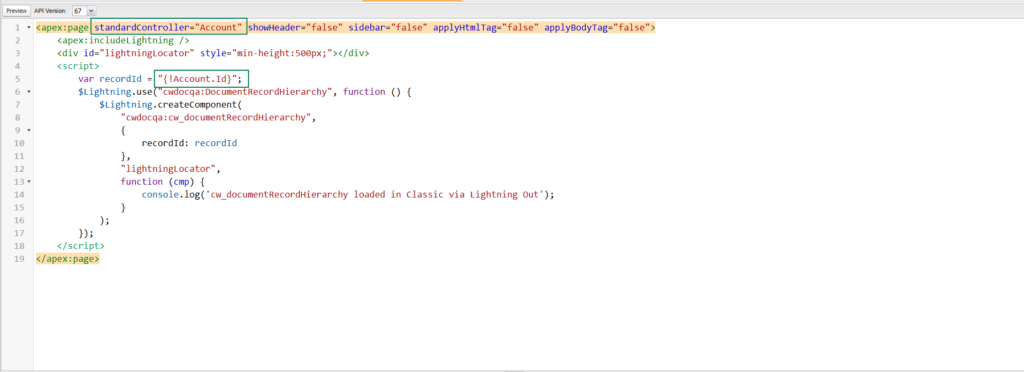
For example, if you want to configure the Visualforce page for the Account object:
<apex:page standardController=”Account” showHeader=”false” sidebar=”false” applyHtmlTag=”false” applyBodyTag=”false”>
<apex:includeLightning />
<div id=”lightningLocator” style=”min-height:500px;”></div>
<script>
var recordId = “{!Account.Id}”;
$Lightning.use(“cwdocqa:DocumentRecordHierarchy”, function () {
$Lightning.createComponent(
“cwdocqa:cw_documentRecordHierarchy”,
{
recordId: recordId
},
“lightningLocator”,
function (cmp) {
console.log(‘cw_documentRecordHierarchy loaded in Classic via Lightning Out’);
}
);
});
</script>
</apex:page>
6.Set the Standard Controller to the required target object. And update the recordId to reference the Id of the same object.
7.Save the Visualforce page.
Once the Visualforce page is created and configured, it can be added to the required page layout to display the DocumentRecord Hierarchy and track documents associated with the target object.
Note:The currently provided Visualforce code is for the Opportunity object. To use Document Tracking with another target object, configure the Standard Controller with the appropriate object.
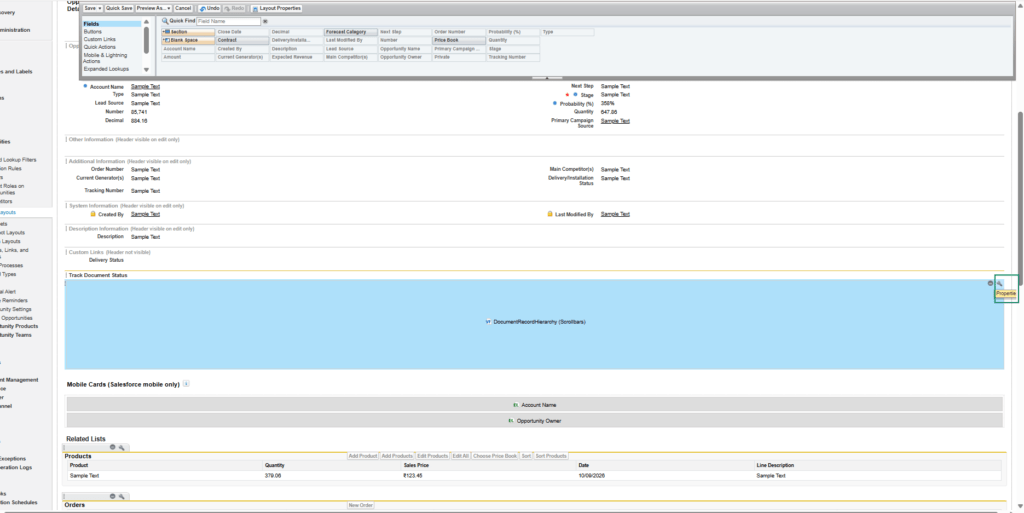
Track Signer Status on the Target Object Record
The Document Record Hierarchy section allows users to view and track documents associated with the target object record.
To display this information in Salesforce Classic, the DocumentRecord Hierarchy Visualforce page must be added to the required page layout.
Steps to Configure Document Record Hierarchy
1.Navigate to the required target object record.
2.Click Edit layout.
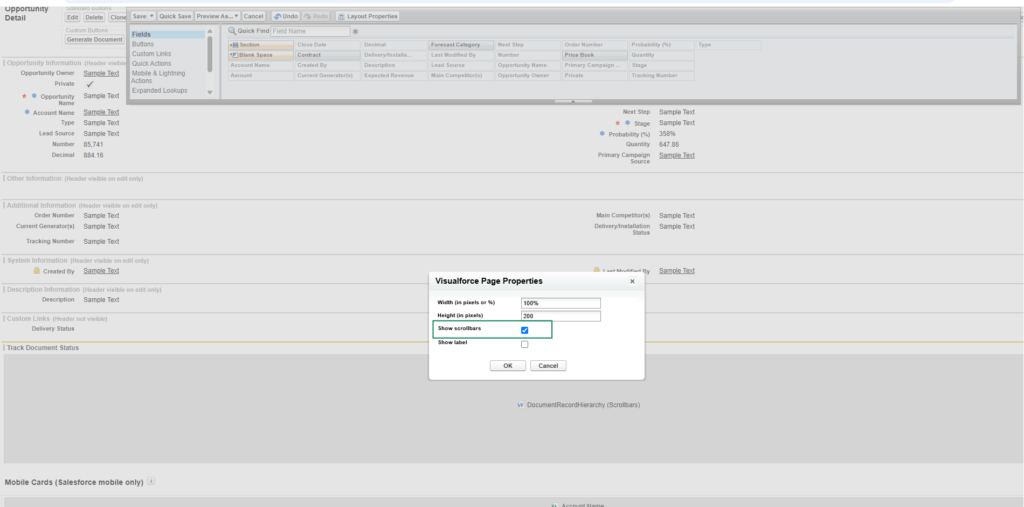
3.Navigate to the Visualforce Pages section.
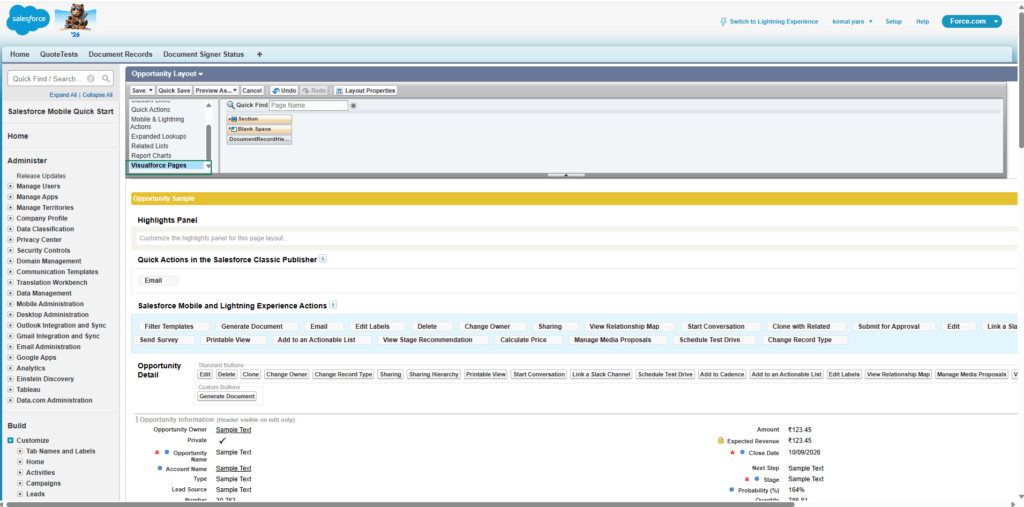
4.Drag and drop the DocumentRecord Hierarchy Visualforce page onto the page layout.
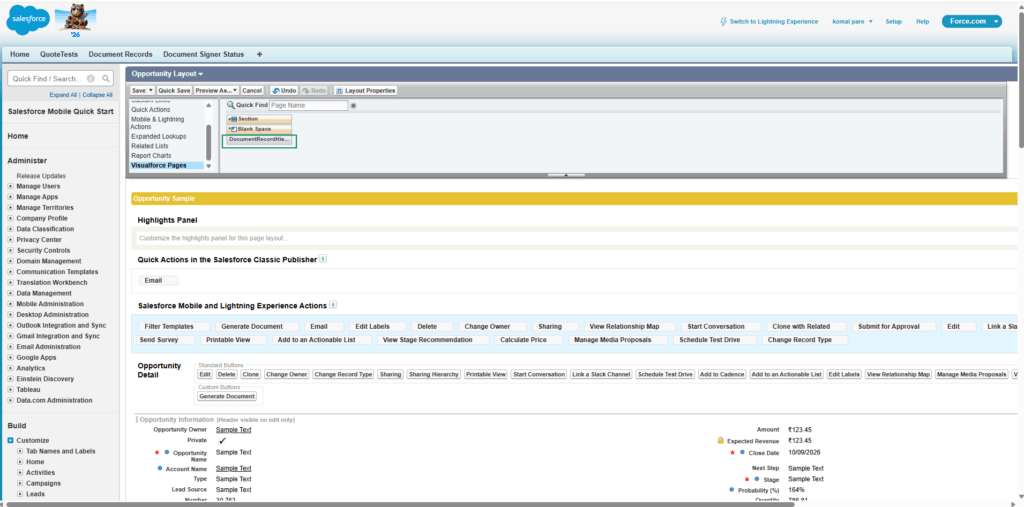
5.Click Save.
After the Visualforce page has been configured:
1.Navigate to the required Target Object record.
2.Locate the Track document section.
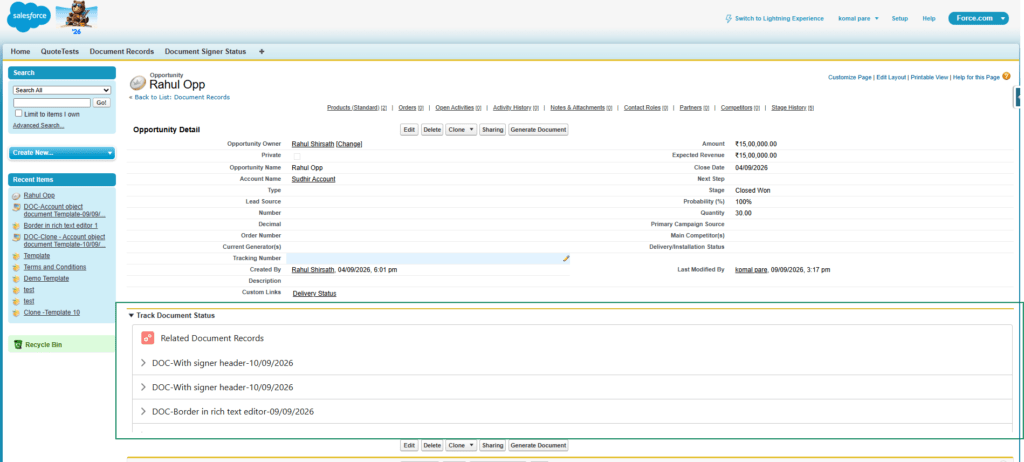
3.Review the documents associated with the target record.
The Document Record Hierarchy provides visibility into the document records generated from the target object and helps users track the relationship between the target record and its generated documents.
To view all documents properly, enable the Show Scrollbar checkbox in the properties icon where the Visualforce page is added.
 SEE ALSO :
____👉 Generate Document Using Flow with Filtered Templates