




 Salesforce ERP
 ERP + CRM Platform
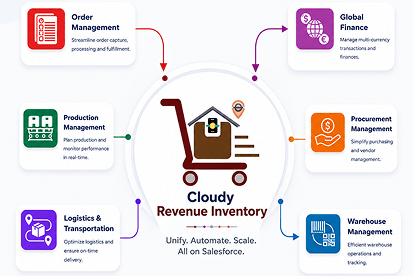
  Inventory Management
  Warehouse Management
  Order Management
  Vendor Management
  Logistics Management
  BOM Management
  Order Fulfillment
  Business Operations
  SaaS Platform for Operations
  Salesforce Cloud ERP Platform
  Xero
Xero
 Zoho books
 Quickbooks
 Shopify
 Acumatica
 SAP
SAP
 Odoo
Odoo
 NetSuite
 Microsoft Dynamics 365
 Sage
Sage


 Agentforce Revenue Management
 Agentforce Revenue Management + Billing
  Salesforce CPQ
 Salesforce Advanced Billing
  Migrate from CPQ to ARM
  Managed Services
 Salesforce Implementation
 Revenue Cloud Implementation
 MuleSoft Integration
 Microsoft
 Data Cloud
 Tableau
 Post-Setup Requirement
After installing the DocGen and Signer package, the application must be configured before it can be used by end users through the user interface (UI).
1. Search app :
Search for the “ DocGen and Signer ” in the app launchers search box.

2. Assign Permission Set :
Assign the permission set to the Standard User or System Administrator to ensure they have the required access to perform all necessary actions within the application. Only the System Administrator has the right to assign the permission set to other users.
Steps to Assign the Permission set :
➢ Go to Setup (⚙️ Gear icon).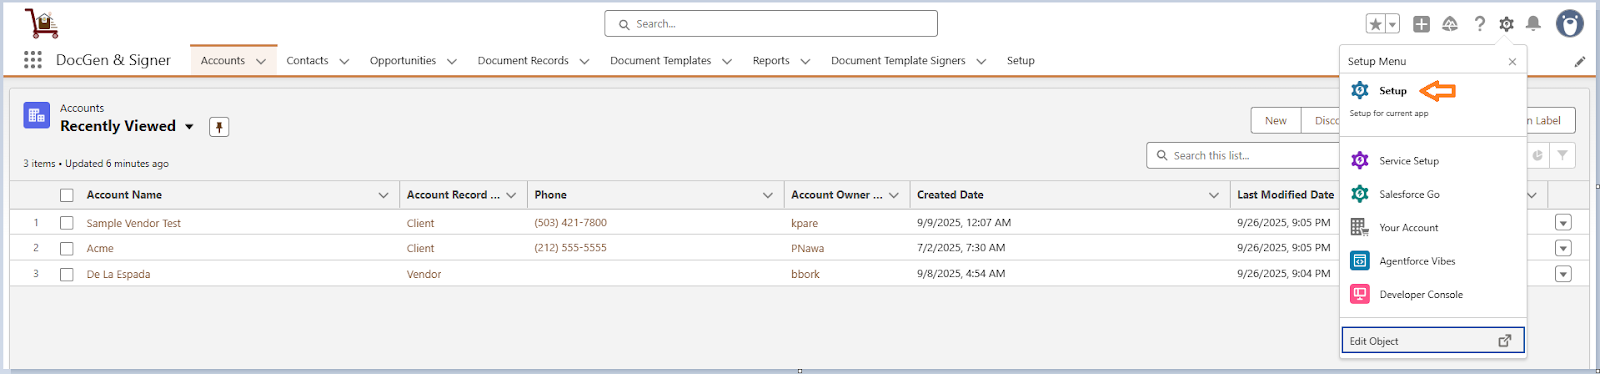
➢ In the Quick Find box, Search Users.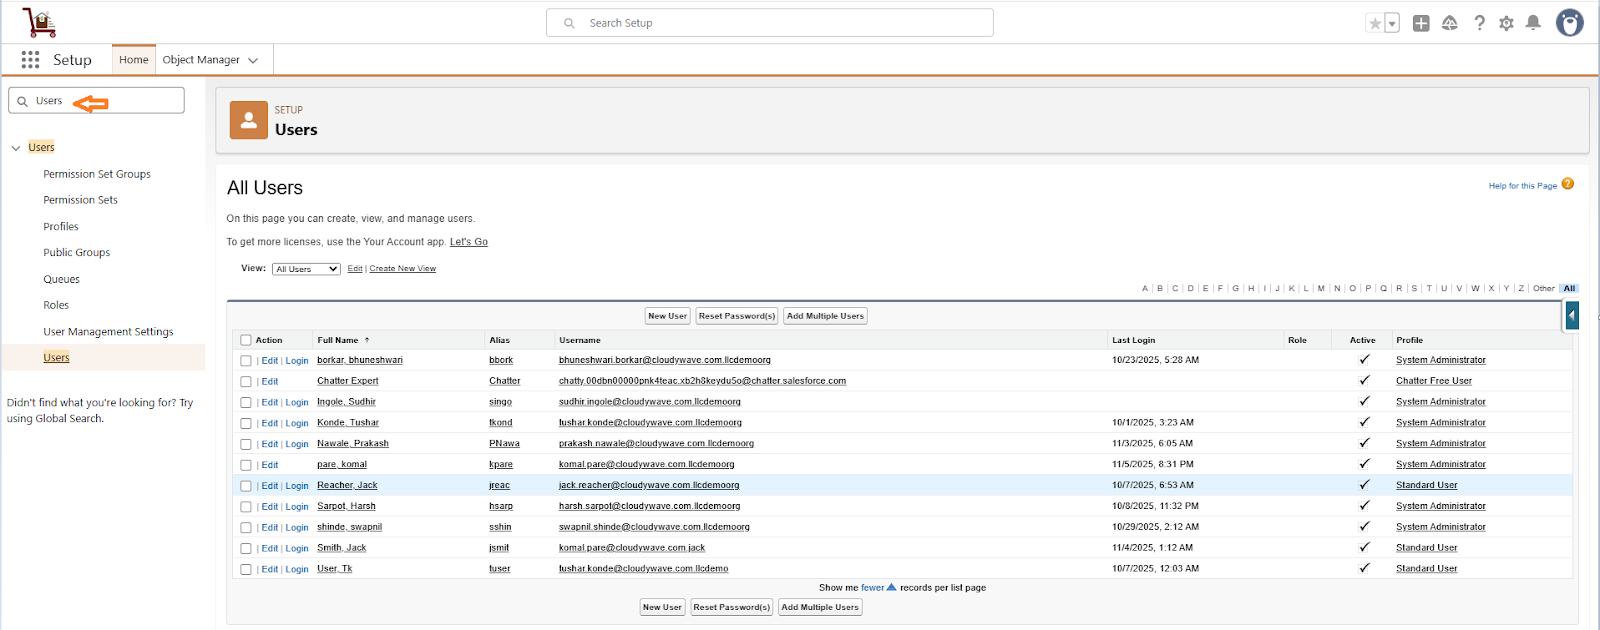
➢ Select the users to whom you want to assign the Permission Set, or assign the Permission Set to yourself as well.
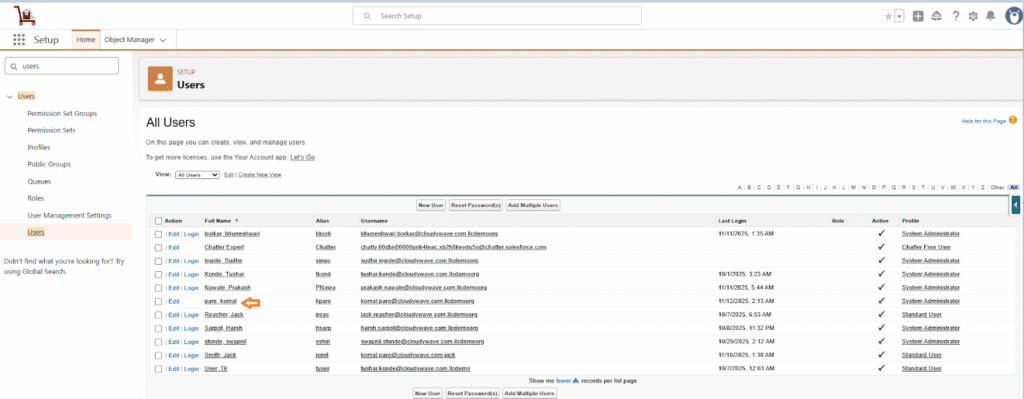
➢ Click on Permission Set Assignment.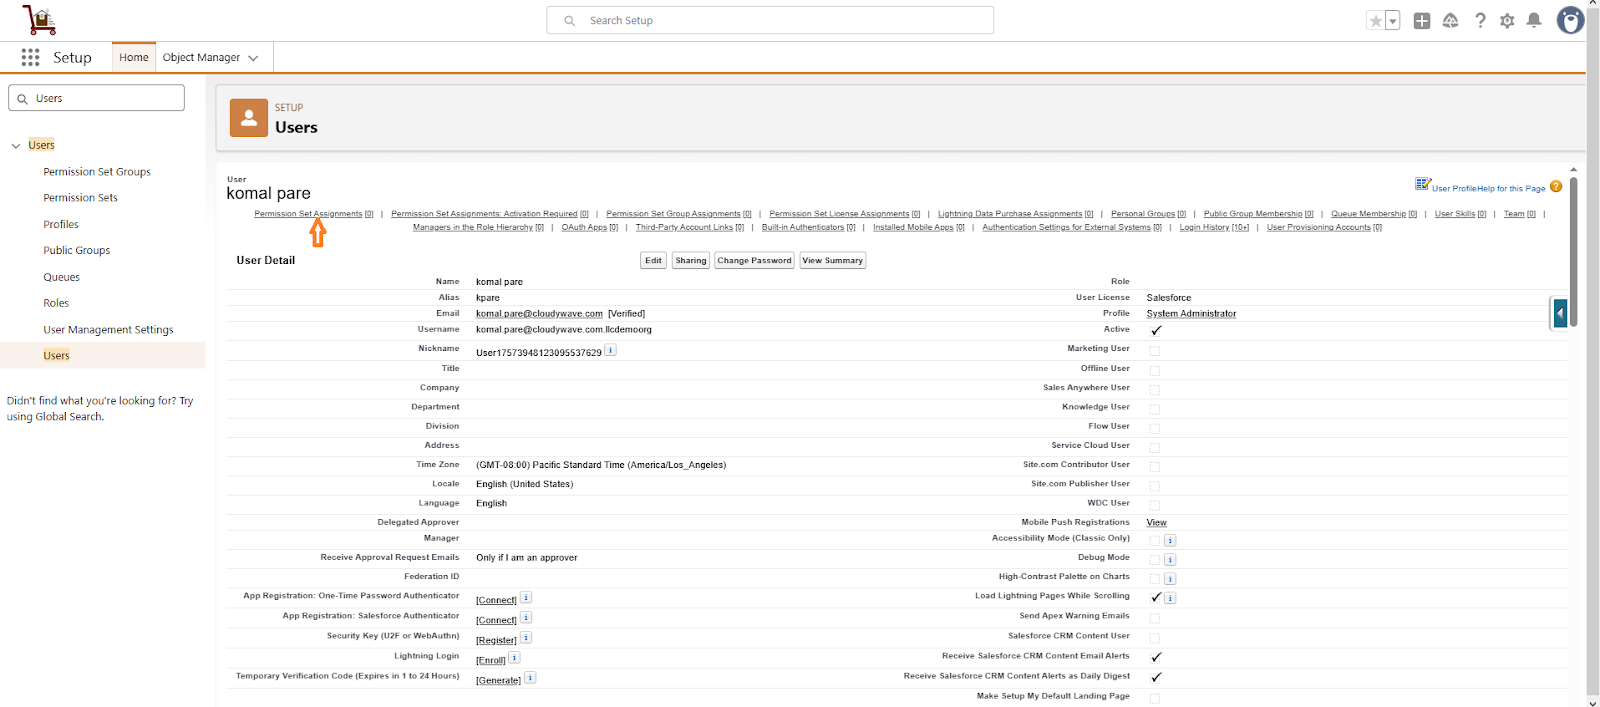
➢ Click on Edit Permission Set.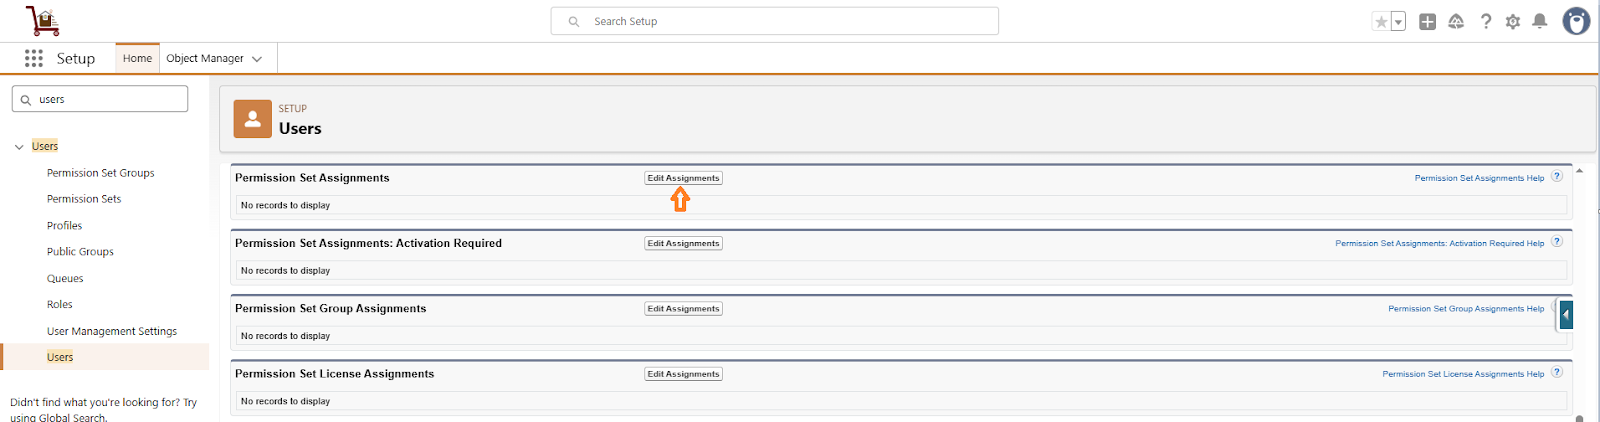
➢ Click on Cloudy DocGen & Signer Full Permissions and click on add Arrow.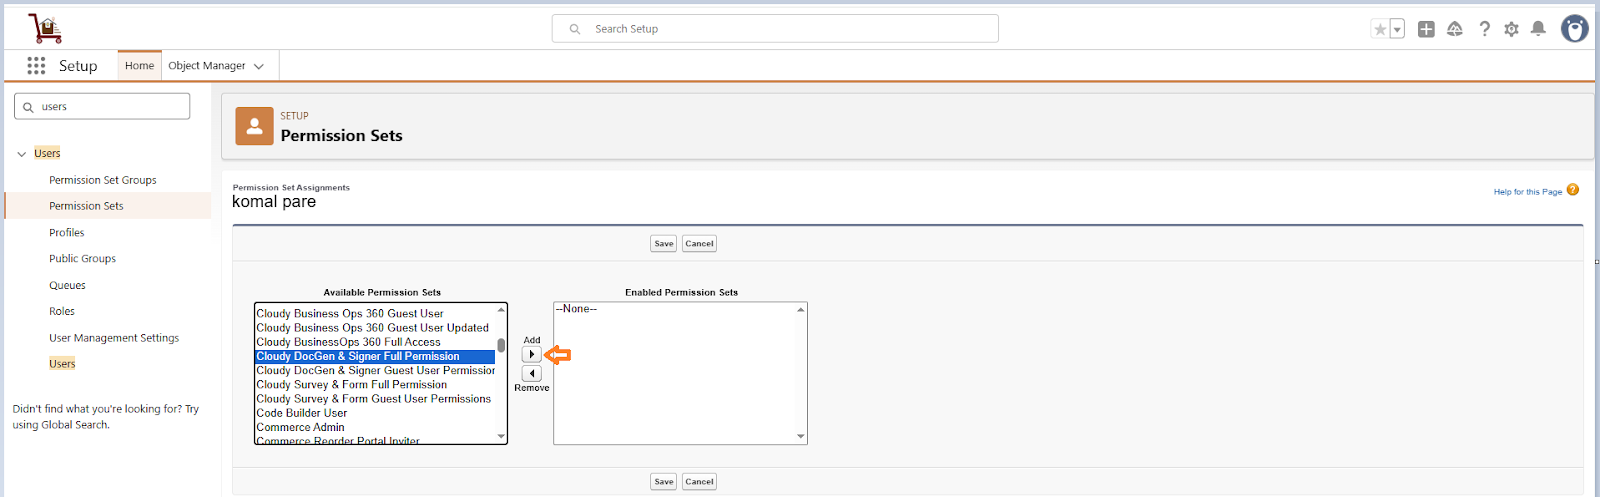
➢ Click on Save.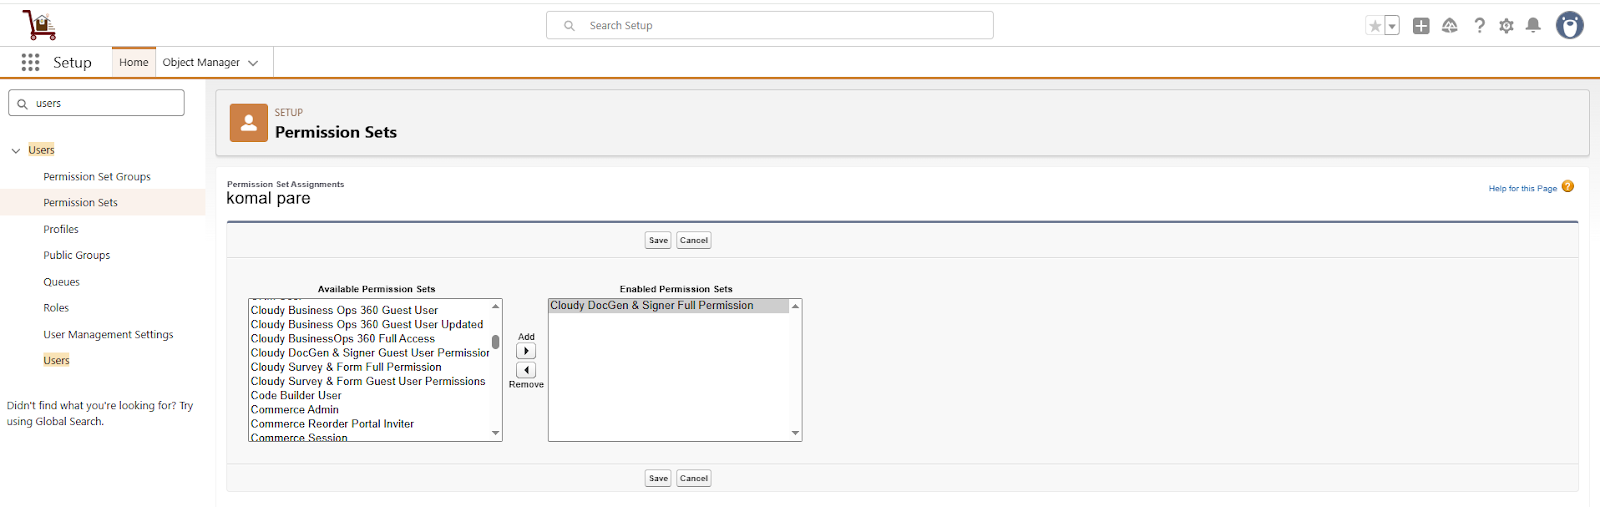
➢ Refresh the org and search for “DocGen and Signer” in the App Launcher search box. If you experience any refresh issues or if the document-related tabs do not appear, log out and log back in.
3. Assign License
Assign the required package license to the Standard User or System Administrator to provide access to the application.
Only a System Administrator can assign the package license to other users.
Steps to Assign the license to the user:
1.Click the Gear icon (⚙️).
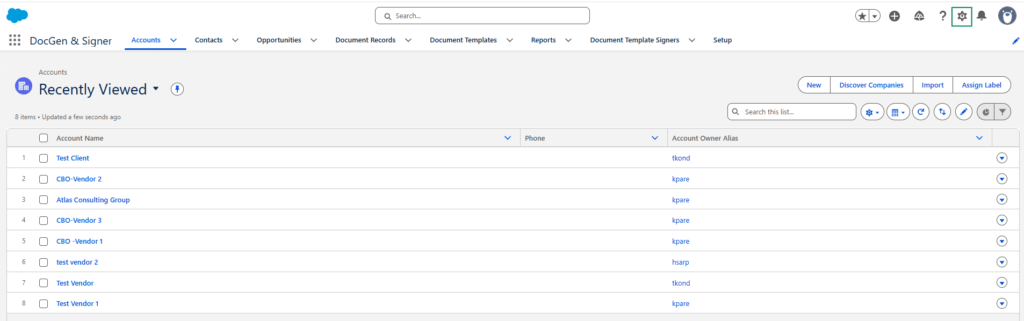
2.Select Setup.
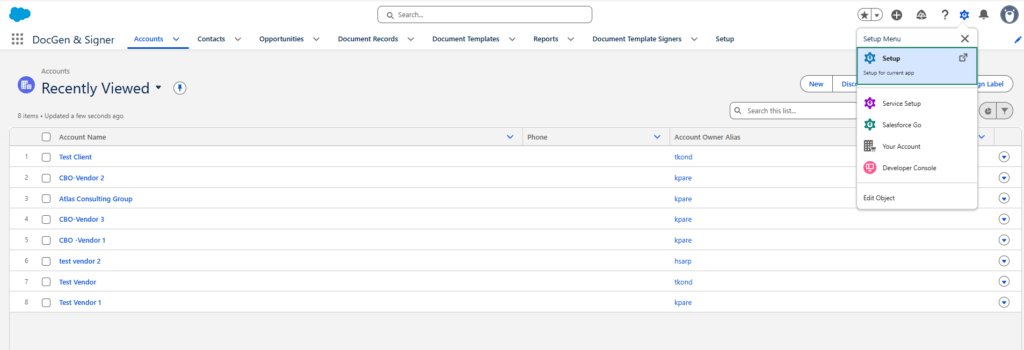
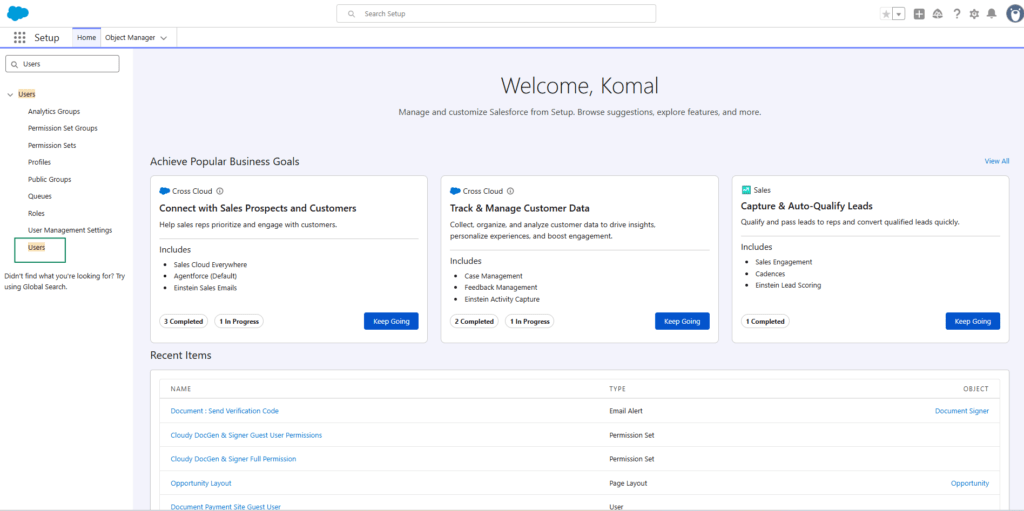
3. In the Quick Find box search user.
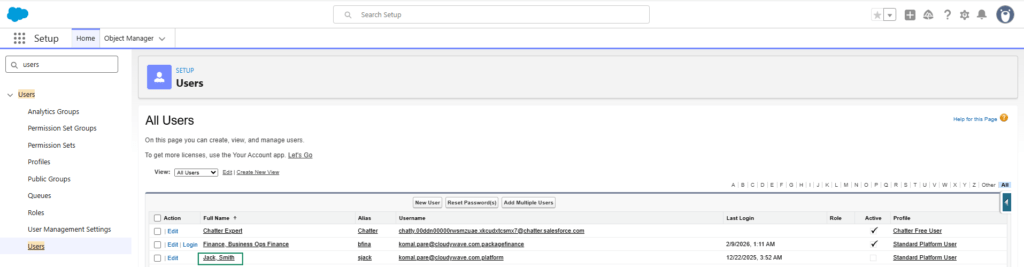
4.Click on Users
5.Click the user to whom you want to assign the license.
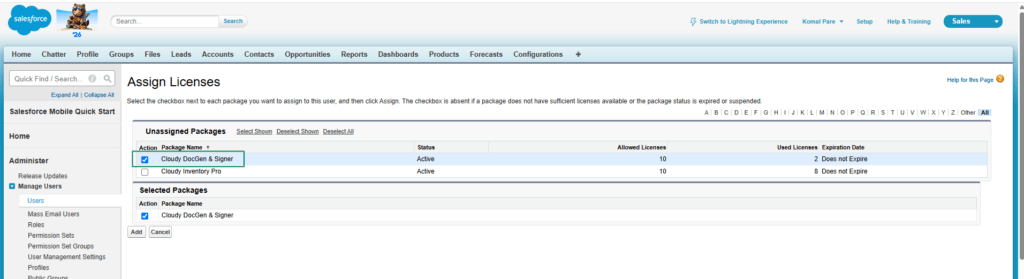
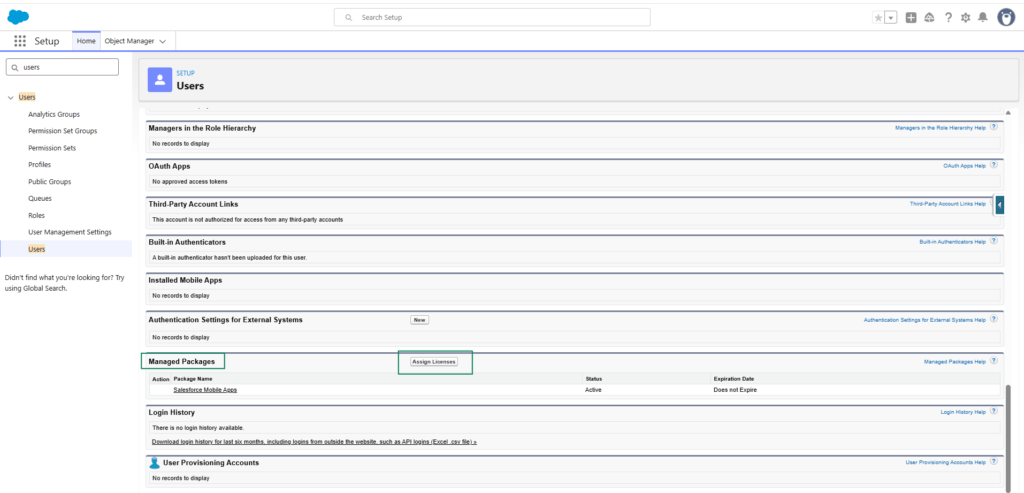
6.Scroll down to the Managed Packages section and click Add Licenses.
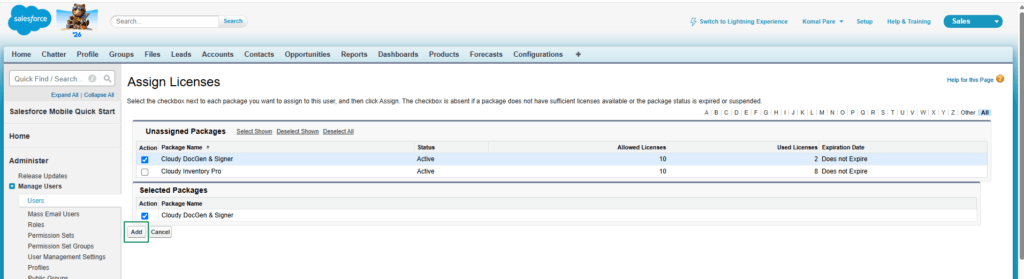
7.Select the package that you want to assign to the user.
8.Click on Add button
Assign License to a Guest User
To assign the package license to a Guest User, first assign the appropriate Guest User Permission Set and then assign the package license.
Steps:
- Navigate to Setup → Permission Sets.
- Select the required Guest User Permission Set. i.e. Cloudy DocGen & Signer Guest User Permission Set
- Click Manage Assignments.
- Click Add Assignments and select the required guest user.
- Click Next and then Assign.
- Navigate to the user’s Managed Packages section.
- Click Add Licenses.
- Select the required package license.
- Click Add to assign the license.
4. Site Setup :
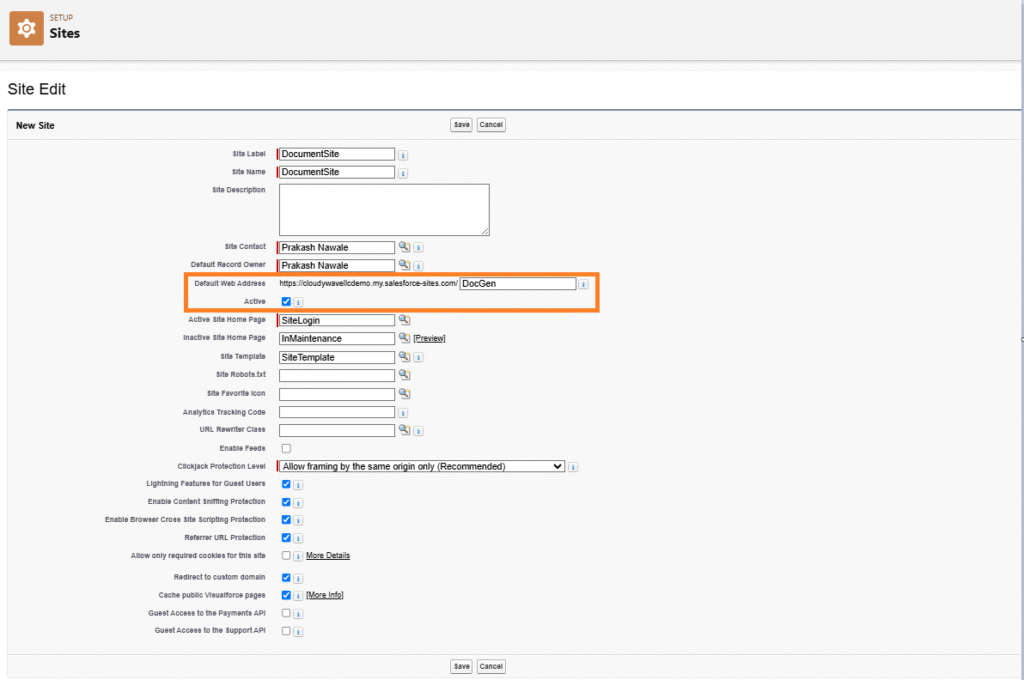
To set up a Site, click the Setup (⚙️ Gear icon) → type “Sites” in the Quick Find box → select Sites → click New, then enter the required site details.
Setup Configuration :
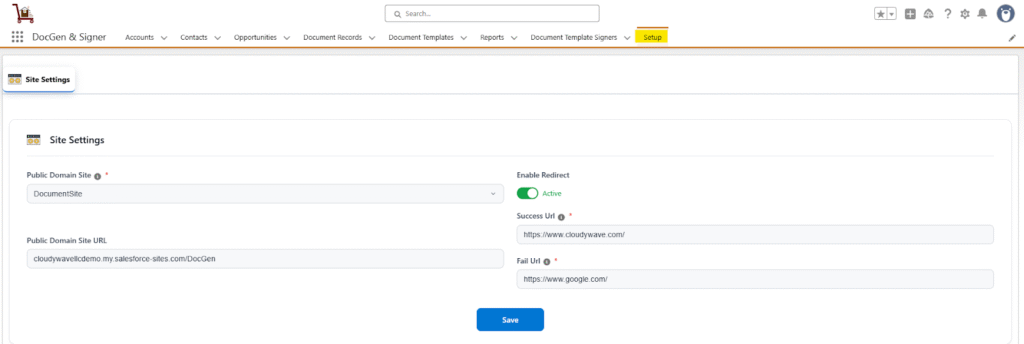
This process enables us to configure system-level settings necessary for document generation and signing. It includes linking the document process to a Salesforce Public Domain Site, setting up redirects, and defining success or failure landing pages or messages. These configurations ensure that signers experience smooth navigation and clear feedback while interacting with generated documents.
Steps to Configure
➢ Go to the Setup tab.
➢ Select the existing Public Domain Site.
➢ Enable the Redirect option if you want to redirect users to another page after document actions.
➢ If using redirects, enter the Success URL (Users are redirected to after a successful action).
➢ Enter the Fail URL (page users are redirected to if the action fails).
➢ Click Save to apply the configuration.
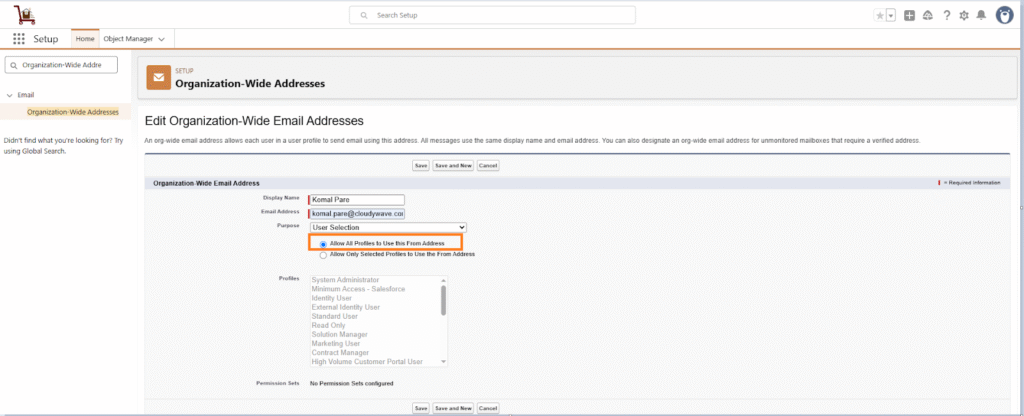
5. Organization-wide Email Addresses :
To send emails to signers, the application uses Organization-Wide Email Addresses. This feature allows emails to be sent from a verified organizational email address.
Steps to Add an Organization-Wide Email Address
➢ Go to Setup (⚙️ Gear icon).
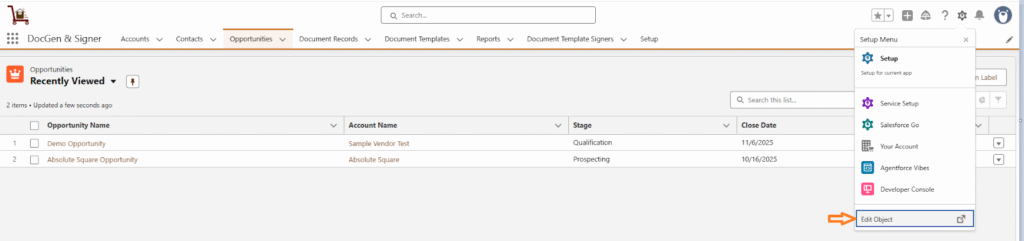
➢ In the Quick Find box, search for Organization-Wide Email Addresses.
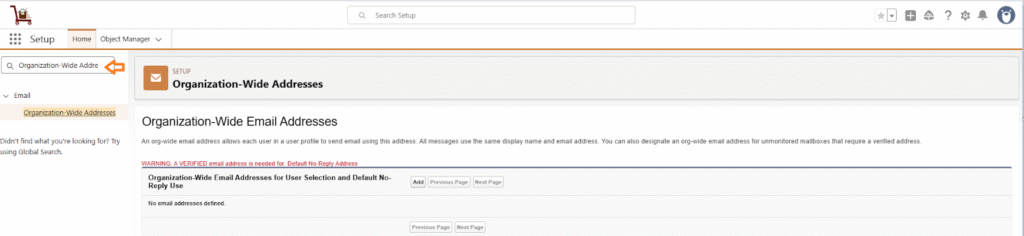
➢ Click Add and Enter the required details such as Display Name, Email Address.
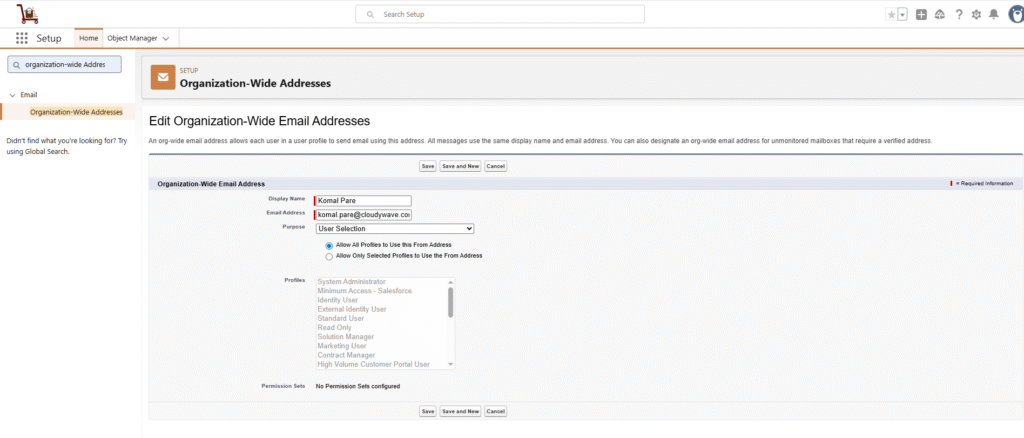
➢ Select the radio button Allow All Profiles to Use this From Address. Emails will not be sent to the signers if a profile is not selected.
➢ Click Save.
➢ A verification email will be sent to the provided email address. Open the email and click the verification link to confirm.
6. Setup Session Setting :
Enable Lightning Web Security
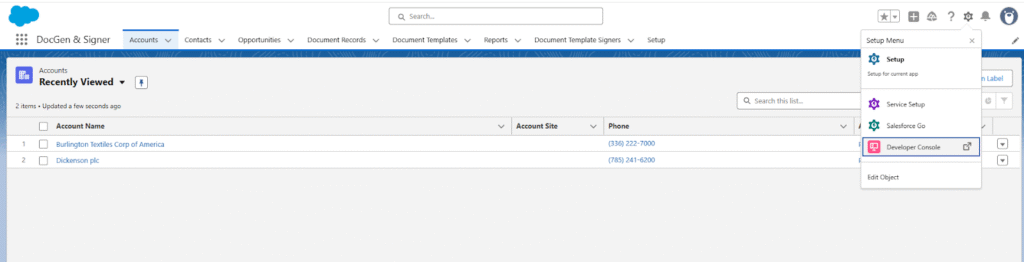
➢ Go to Setup (⚙️ Gear icon).
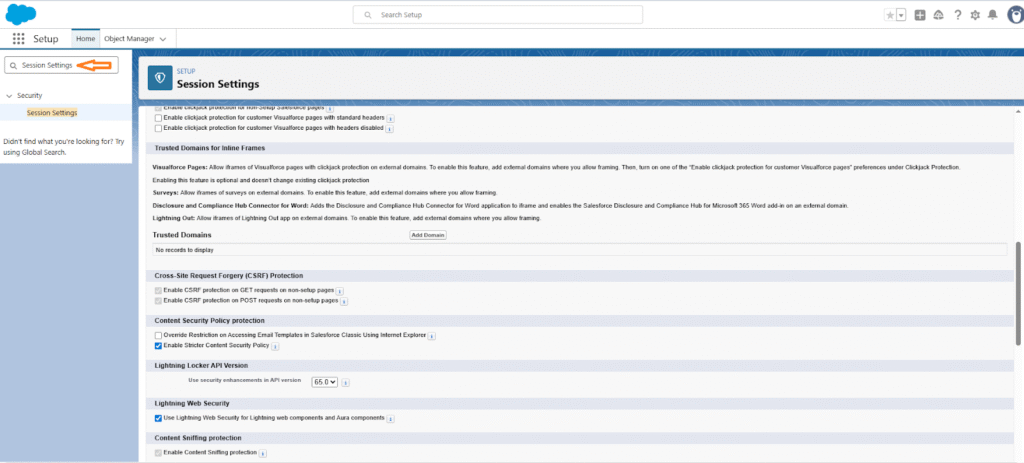
➢ In the Quick Find box, type Session Settings and select it.
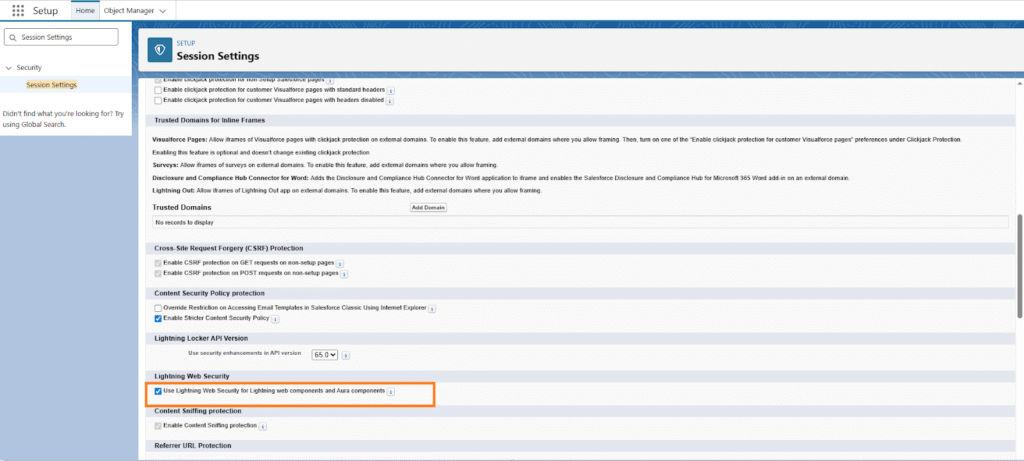
➢ Scroll to the Lightning Web Security section.
➢ Check the Enable Lightning Web Security checkbox.
➢ Click Save to apply the changes.
7. Prerequisites for Verification Code Settings
Before configuring the Verification Code settings, ensure that the following Salesforce settings are configured correctly.
Verify the Automation Flow
Ensure that the required Flow for sending the document with a verification code is active.
The active Flow should be configured according to your business requirements and should trigger the document and verification code email when the defined conditions are met.
Configure Email Deliverability
If users are not receiving verification code emails, check the Salesforce Deliverability settings.
Steps to configure Email Deliverability:
1.Click the Gear icon (⚙️).
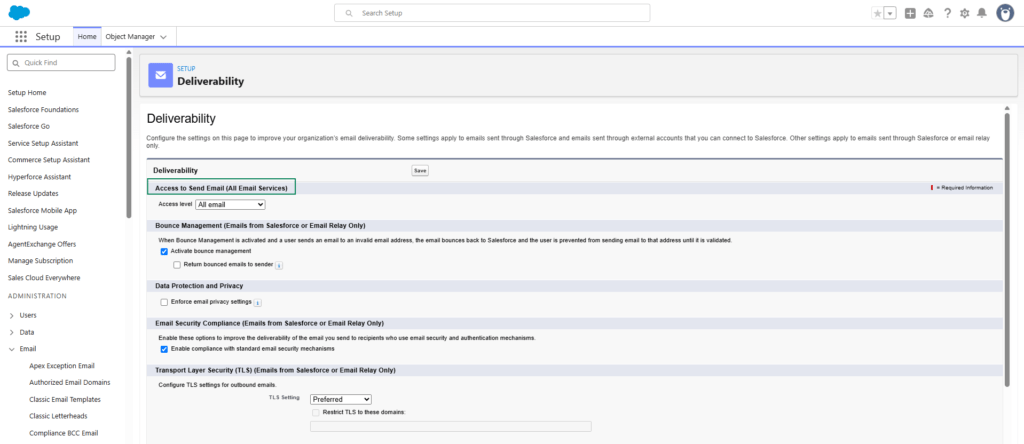
2.Select Setup.
3.In the Quick Find box, search for Deliverability.
4.Open Deliverability under Access to Send Email (All Email Services).
5.Check the Access Level.
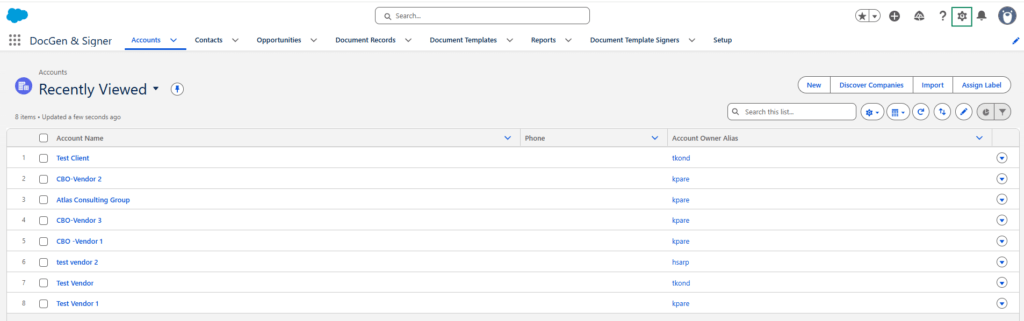
6.Set the Access Level to All Emails.
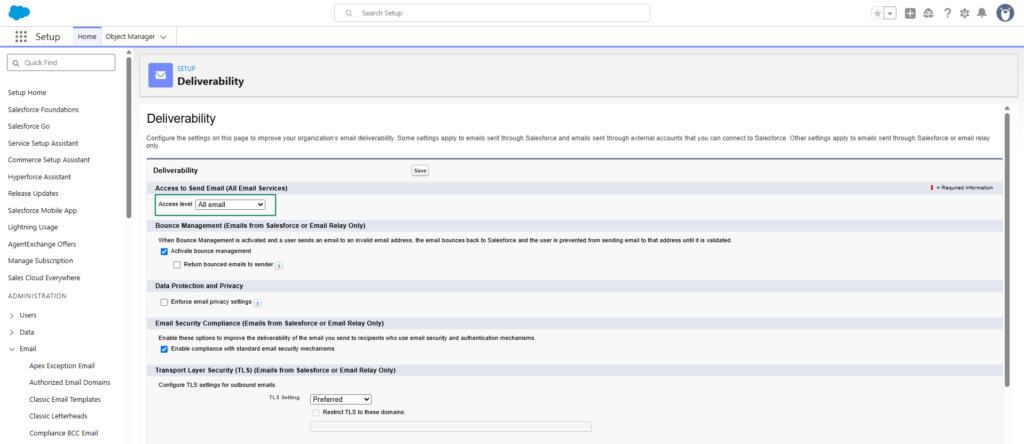
7.Click Save.
Configure Workflow Rule Email Settings
Verify that the required Workflow Rule email configuration is set correctly.
Steps to Configure Workflow Rule Email Settings
- Click the Gear icon (⚙️).
- Select Setup.
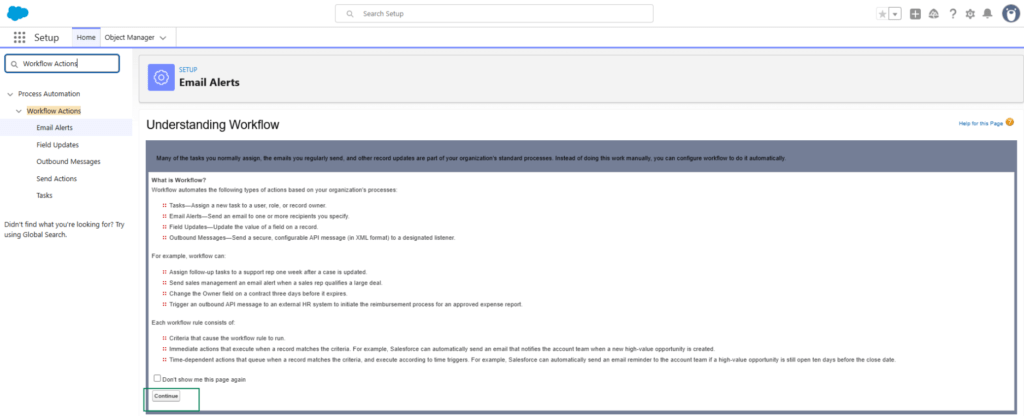
- In the Quick Find box, search for Workflow Actions.
- Click on Email Alerts.
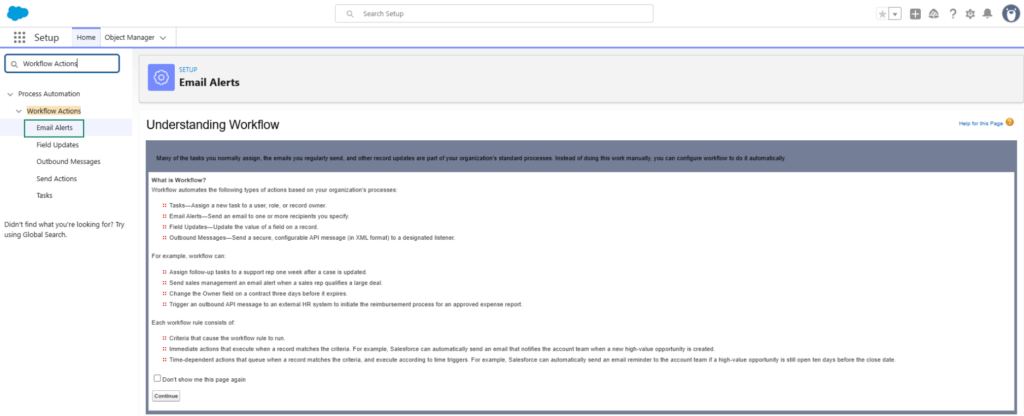
- Click Continue.
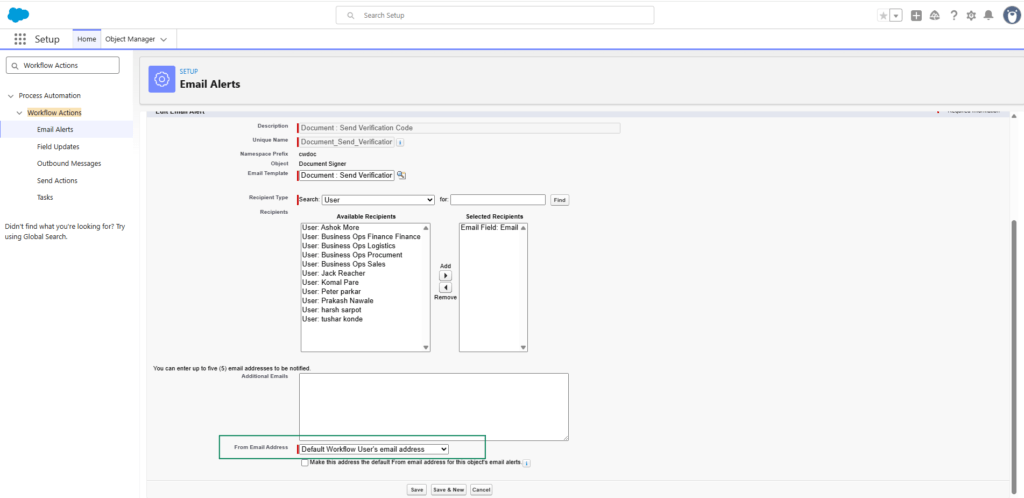
- Ensure that the From Email Address is configured as the Default Workflow User’s Email Address.
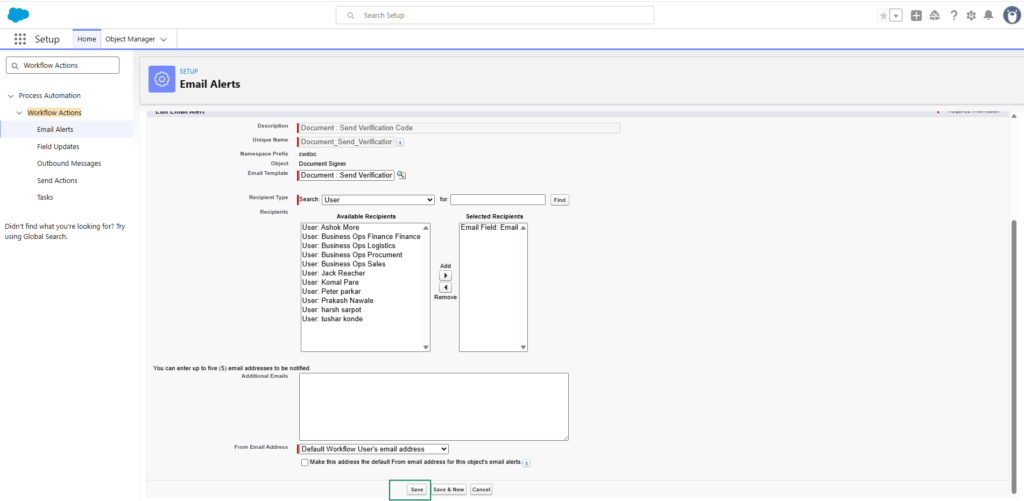
- Click Save.

Note: These settings should be configured before testing the Verification Code functionality to ensure that verification code emails are delivered successfully.