





 Salesforce ERP
 ERP + CRM Platform
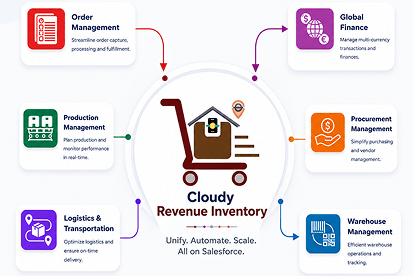
  Inventory Management
  Warehouse Management
  Order Management
  Vendor Management
  Logistics Management
  BOM Management
  Order Fulfillment
  Business Operations
  SaaS Platform for Operations
  Salesforce Cloud ERP Platform
  Xero
Xero
 Zoho books
 Quickbooks
 Shopify
 Acumatica
 SAP
SAP
 Odoo
Odoo
 NetSuite
 Microsoft Dynamics 365
 Sage
Sage



 Agentforce Revenue Management
 Agentforce Revenue Management + Billing
  Salesforce CPQ
 Salesforce Advanced Billing
  Migrate from CPQ to ARM
  Managed Services
 Salesforce Implementation
 Revenue Cloud Implementation
 MuleSoft Integration
 Microsoft
 Data Cloud
 Tableau

 Post-Setup Requirement
After installing the Survey package, the application must be configured before it can be used by end users through the user interface (UI).
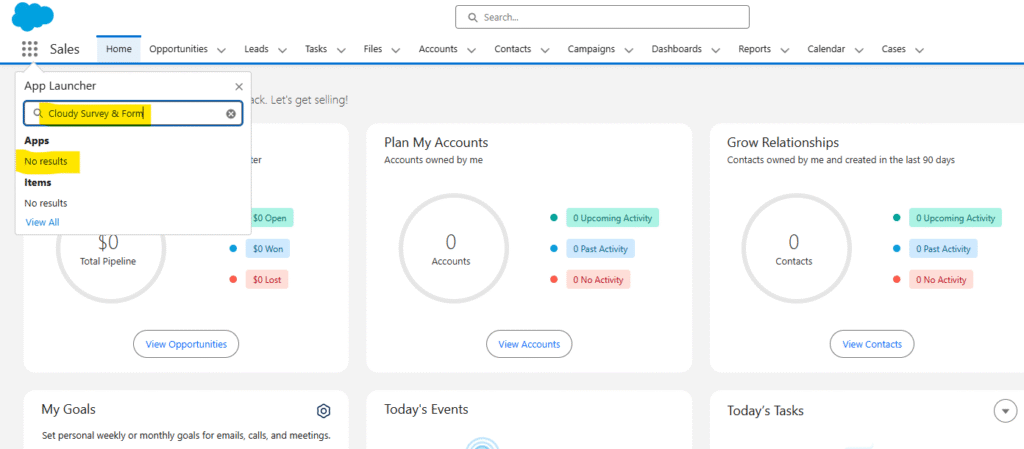
If a user or administrator is unable to see the Cloudy Survey & Form product (or its tabs/apps) in the App Launcher or the main navigation bar after installation, the cause is typically missing Permission Set Assignments.
The following steps must be performed by a Salesforce Administrator to grant the necessary permissions to the specific user:
Steps to Assign Required Permission Sets
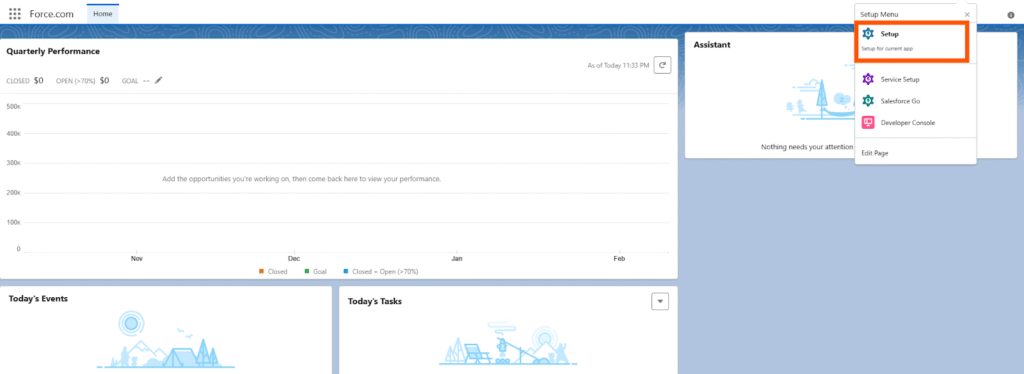
Step 1: Go to Setup (⚙️ Gear Icon)
- Click the gear icon in the upper-right corner of Salesforce.
- Select Setup from the dropdown.
Step 2: Open Users List
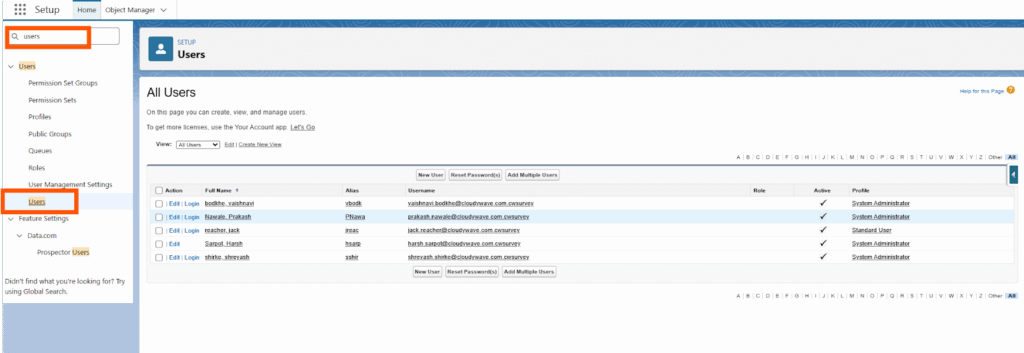
- In the Quick Find box on the left, type Users.
- Click on Users under the “Users” section.
Step 3: View All Users
- If you don’t see the user, click the View dropdown and select All Users to show everyone.

Step 4: Select the Target User
- Click on the Name of the user who needs access to the product/app.
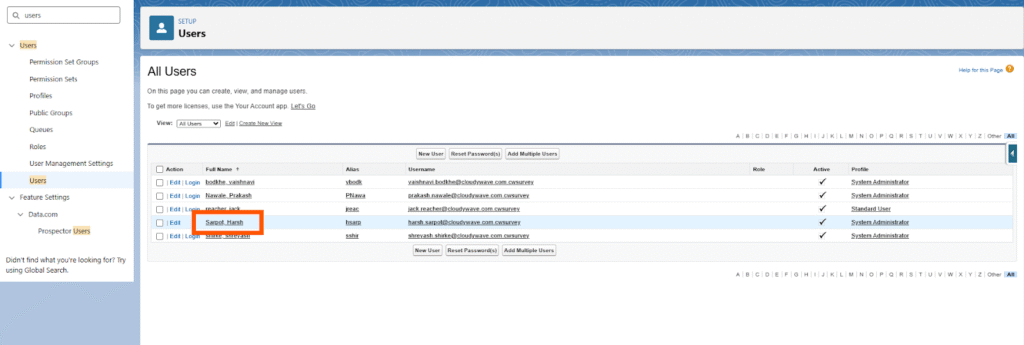
Step 5: Open Permission Set Assignments
- On the user’s record page, scroll down to find the Permission Set Assignments related list.
- Click Edit Assignments.
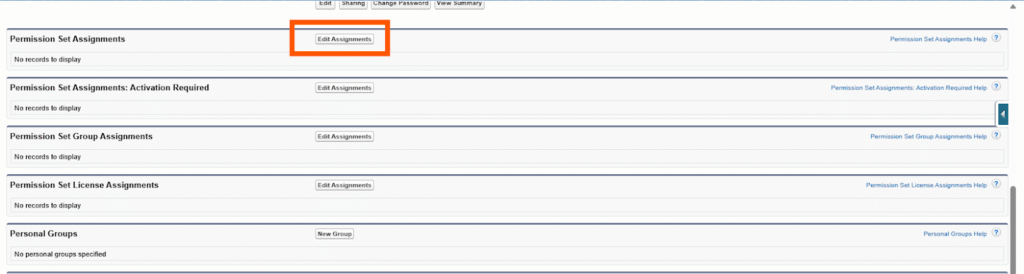
Step 6: Find the Required Permission Sets
- In the Available Permission Sets list, locate:
- Survey Full Permission – gives full access to create, edit, and manage surveys.
- Survey Guest User Permission – required for public-facing forms to collect data.

Step 7: Assign Permission Sets
- Select both permission sets.
- Click the Add (→) arrow to move them to the Enabled Permission Sets column.
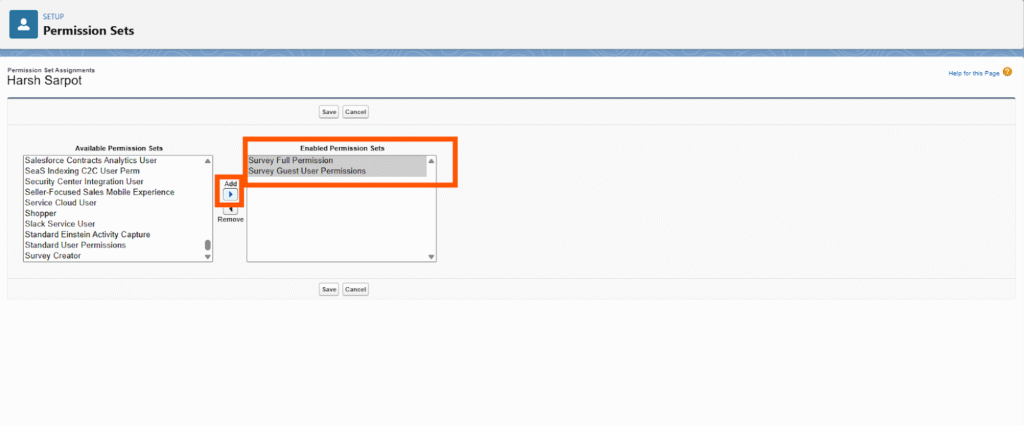
Step 8: Save Changes
- Click Save to finalize the permission assignments.
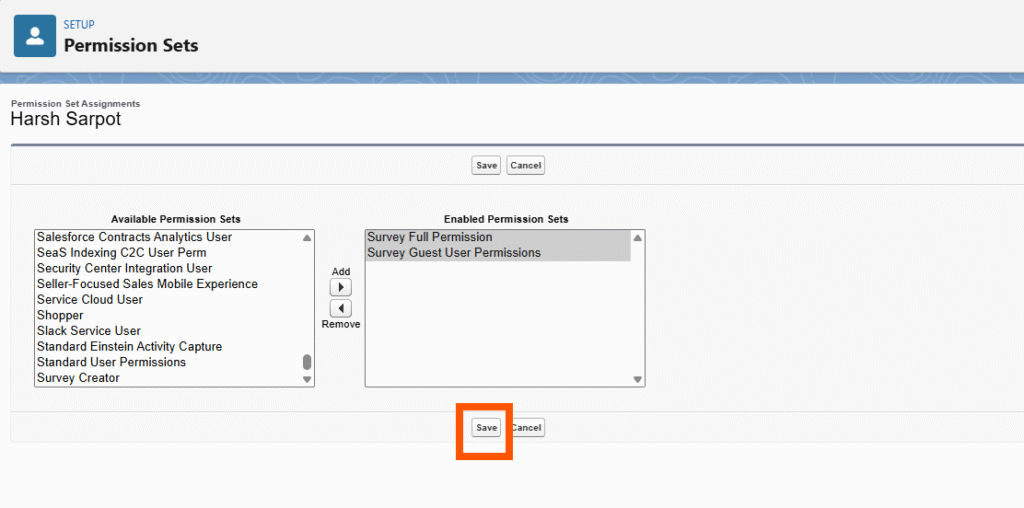
Once these steps are completed, the user should log out and log back in, and the Cloudy Survey & Form application and tabs will be visible in their App Launcher and navigation bar.
This application needs to be configured after Cloudy Survey & Form package installation and before the end user begins using it through the user interface (UI).
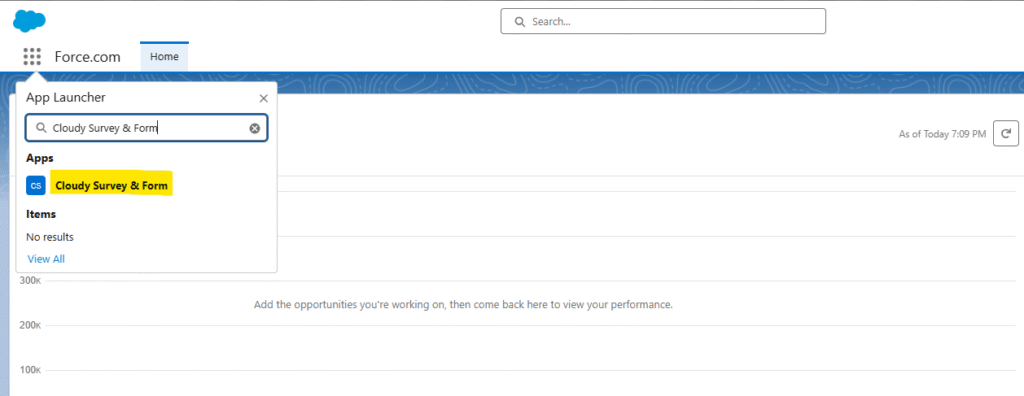
1. Search for the “Cloudy Survey & Form” in the app launchers search box.
2. Site Setup :
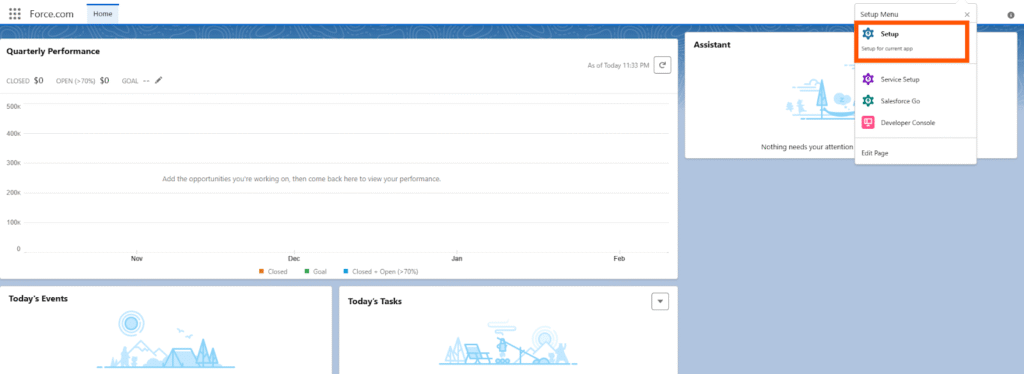
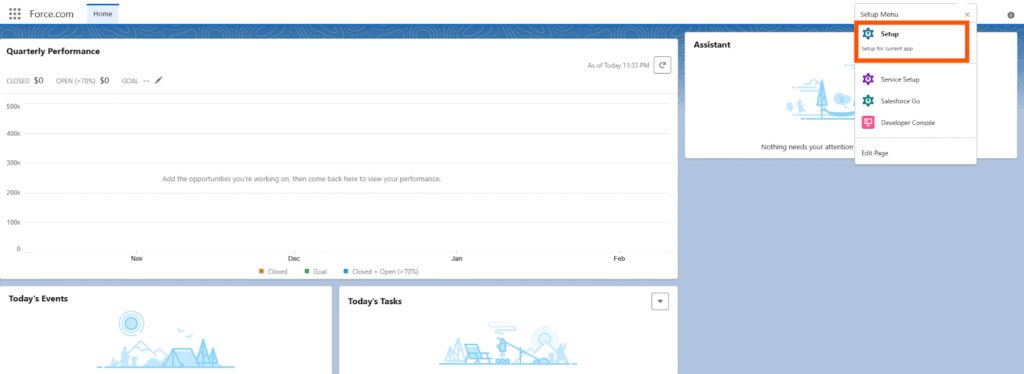
Step 1: Go to Setup (⚙️ Gear Icon)
- Click the gear icon in the upper-right corner of Salesforce.
- Select Setup from the dropdown.
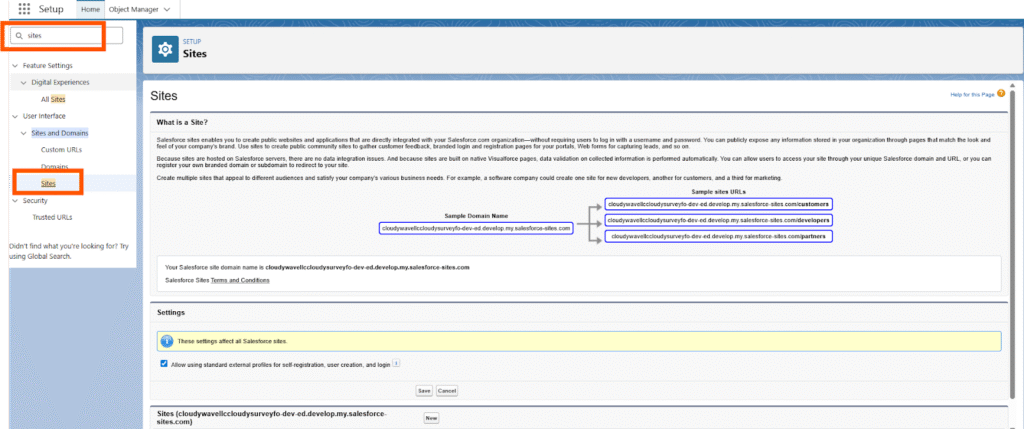
Step 2: Open Sites
- In the Quick Find box on the left, type sites.
- Click on Sites under the “Sites and Domains” and section.
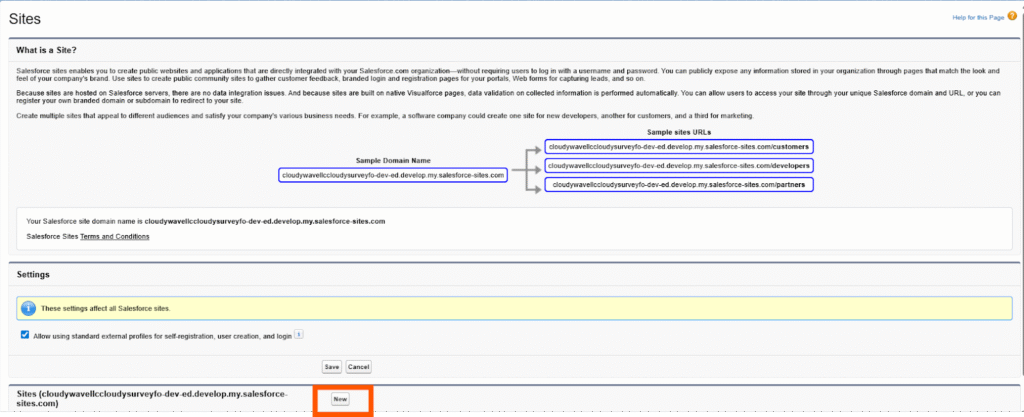
Step 3: Create New site
- In the Settings have a New button.
Step 4: Enter the Details
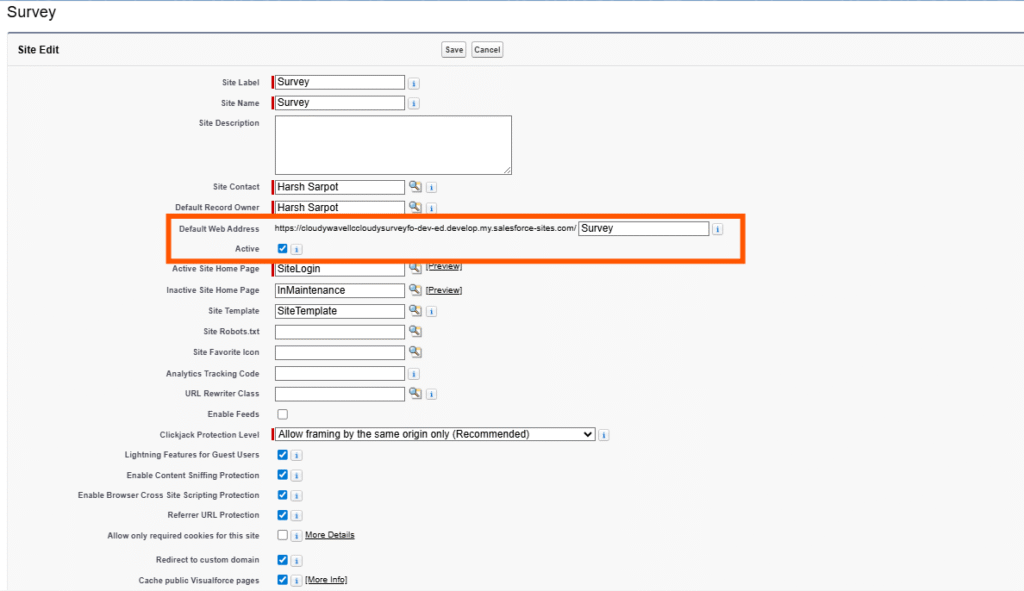
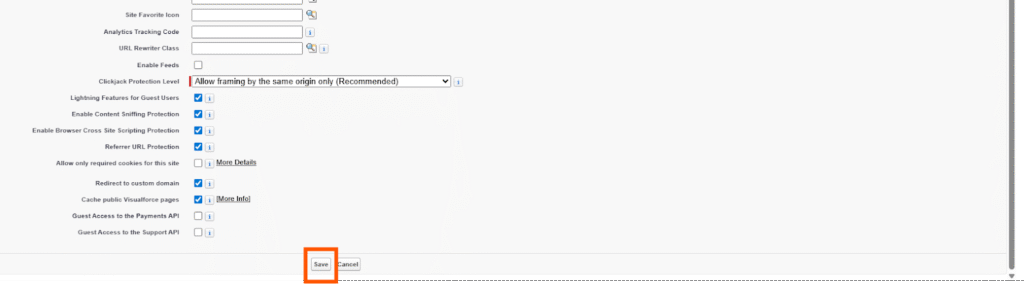
Step 8: Save Changes
- Click Save
4. Organization-wide Email Addresses :
To send emails to users, the application uses Organization-Wide Email Addresses. This feature allows emails to be sent from a verified organizational address instead of an individual user’s email.
Steps to Add an Organization-Wide Email Address
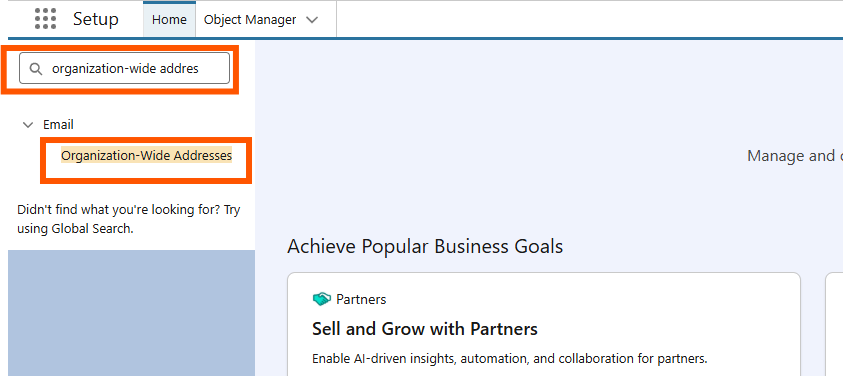
Step 2: Open organization-wide addresses
- In the Quick Find box on the left, organization-wide addresses type.
- Click on organization-wide addresses under the “Email” and section.
Step 3: click on the add button
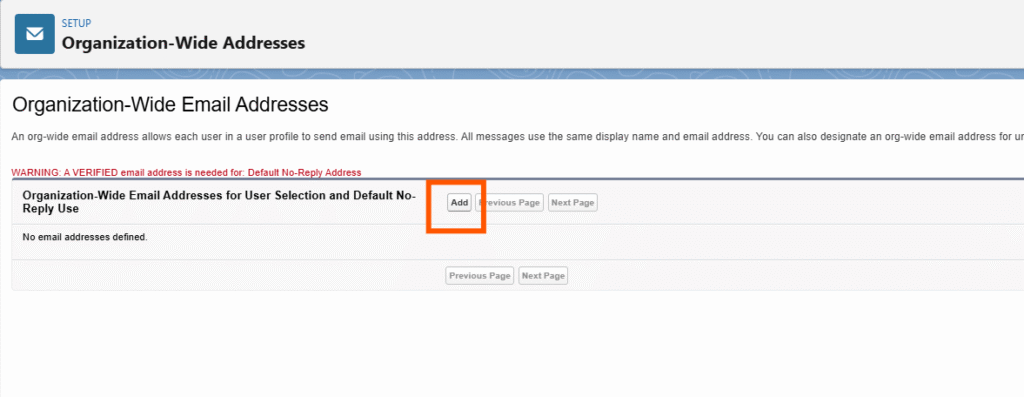
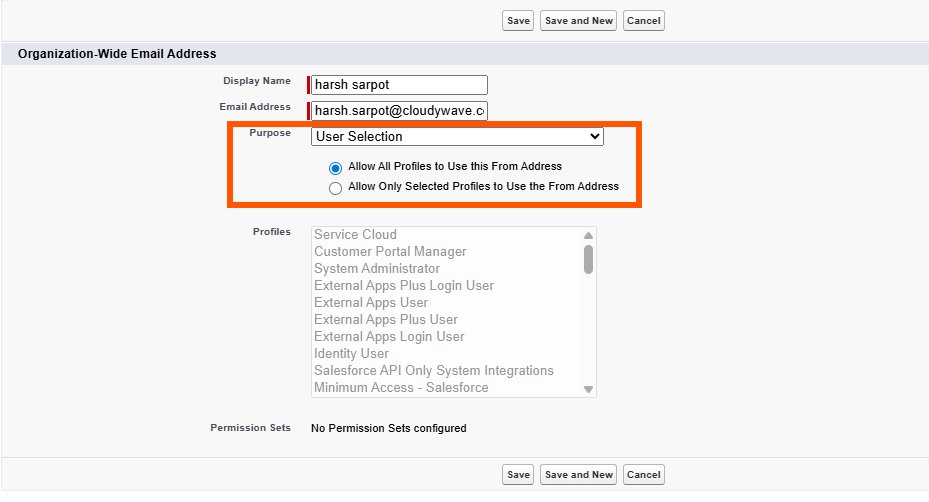
Step 4: Enter the required details
- Such as Display Name, Email Address
- Select the radio button Allow All Profiles to Use this From Address. Emails will not be sent to the user if a profile is not selected
Step 8: Save
- Click Save to finalize
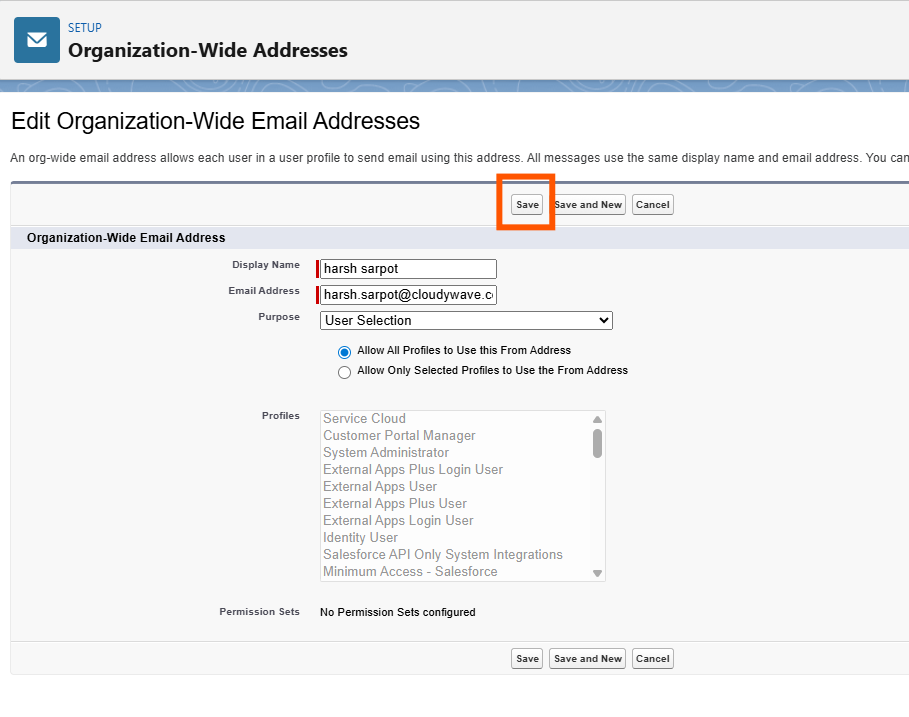
Step 9: Verification
- A verification email will be sent to the provided email address. Open the email and click the verification link to confirm.