Someone changed a permission set in your Salesforce org last Tuesday. A record that should have been locked got edited. A pricing field on a key Opportunity shifted overnight. Who did it? When? And why did you only find out when a customer complained?
This is the daily reality for admins who haven’t set up proper change tracking. Knowing how to set up an audit trail in Salesforce is no longer optional housekeeping — it’s a frontline defense for security, compliance, and simple sanity. Auditors expect it. Regulations like SOX, HIPAA, and GDPR demand it. And your future self, staring at a broken workflow at 5 PM on a Friday, will thank you for it.
This tutorial walks you through everything: the native tools, the exact setup steps, the traps that catch most teams, and how to extend tracking beyond Salesforce’s built-in limits.
What Is an Audit Trail in Salesforce?
An audit trail is a chronological record of who did what and when inside your org. Salesforce doesn’t hand you one single “audit trail” switch. Instead, it gives you two complementary tools:
- Setup Audit Trail — tracks administrative and configuration changes (permissions, profiles, automations, object edits).
- Field History Tracking — tracks changes to the actual data inside records (like an Opportunity amount or a Contact email).
Understanding how to set up an audit trail in Salesforce means understanding that these two systems work together. One watches the builders; the other watches the records.
Why an Audit Trail Matters in 2026
The stakes have climbed. According to Salesforce compliance guidance, financial data governed by SOX requires seven years of retention, HIPAA mandates six years, and GDPR ties retention to the duration of lawful processing. Salesforce’s native tools alone don’t reach those windows — a gap that auditors spot instantly.
A well-configured audit trail delivers:
- Faster incident response — trace a bad change to its source in minutes, not days.
- Regulatory compliance — satisfy SOX, HIPAA, GDPR, and industry frameworks.
- Security monitoring — catch suspicious permission grants or disabled controls.
- Accountability — end the “it wasn’t me” debates for good.
Part 1: How To Set Up an Audit Trail in Salesforce Using Setup Audit Trail
The Setup Audit Trail is built into every org and turned on by default. You don’t “install” it — you configure how you use and preserve it. Here’s the step-by-step.
Step 1: Access the Setup Audit Trail
- Click the gear icon in the top-right corner of any Salesforce page.
- Select Setup.
- In the Quick Find box, type View Setup Audit Trail.
- Click the result.
You’ll see a table of the most recent configuration changes. Note a critical detail: the UI displays only the 20 most recent entries, as documented in Gearset’s audit trail setup guide. Older changes still exist within the retention window, but they’re hidden until you export.
Step 2: Understand What It Tracks
The underlying object is called SetupAuditTrail, available since API version 15.0. As detailed in AuditForce’s complete admin guide, it captures a broad range of changes across your org, including:
| Category |
Examples Tracked |
| Users |
User creation, profile assignment, role and permission set changes, deactivation |
| Security |
Security control edits, login policies, OAuth, SSO settings |
| Automation |
Flows (activation, deactivation, deletion), Apex classes, Validation Rules |
| Data Model |
Custom object and field creation/deletion, record types, page layouts, approval processes |
| Integrations |
Connected apps, named credentials, remote site settings |
Each entry shows the date, the user who made the change, the action, and a Section value telling you which area of Setup was touched. The Section field is your best friend for filtering — high-risk values include Security Controls, Manage Users, and OAuth.
2026 note: Workflow Rules and Process Builder reached end of support on December 31, 2025, per Gearset. Existing automations still run and historical audit entries remain, but Salesforce no longer provides fixes or enhancements for them. Migrate to Flow where possible.
Step 3: Export Logs for Extended Retention
This is where most teams fail. Salesforce retains Setup Audit Trail data for exactly 180 days (six months). After that, entries are permanently deleted and cannot be recovered or extended through native functionality — a limitation confirmed by Gearset. The clock starts the moment the change is made — not when you review it.
To preserve your history, follow the export process outlined in Cube84’s step-by-step guide:
- On the View Setup Audit Trail page, click Download (top-right).
- Salesforce exports up to 180 days of history as a CSV file.
- Store it in secure external storage — a SIEM, encrypted cloud repository, or data warehouse.
- Schedule this weekly at a minimum, so nothing ages out before you capture it.
Step 4: Automate Monitoring with the API
Manual review doesn’t scale. Because SetupAuditTrail is queryable through the REST, SOAP, and Tooling APIs, you can automate the whole thing.
A common, practical setup:
- Build a scheduled Flow that runs daily.
- Query SetupAuditTrail for high-risk Section values (Security Controls, OAuth, Identity).
- Send an email or Slack alert if anything appears in the last 24 hours.
It isn’t bulletproof — a malicious actor could deactivate the Flow — but it beats discovering a breach months later. For heavier needs, integrate the API with a SIEM tool for real-time monitoring and anomaly alerts, an approach recommended by ManageEngine.

Part 2: How To Set Up an Audit Trail in Salesforce Using Field History Tracking
Setup Audit Trail watches configuration. To watch your data, you need Field History Tracking. This is the second half of learning how to set up an audit trail in Salesforce properly.
Step 1: Enable Field History Tracking on an Object
- Go to Setup → Object Manager.
- Select your target object (for example, Opportunity).
- Click Fields & Relationships.
- Click Set History Tracking.
- Check Enable [Object] History.

Step 2: Choose Which Fields to Track
Select the fields that matter most for compliance and security — pricing, discounts, approval status, contract terms, ownership. With standard licensing you can track up to 20 fields per object.
Prioritize based on:
- Regulatory exposure (fields tied to financial reporting or personal data)
- Data sensitivity
- Change frequency
Once enabled, changes are written to the object’s related history table (for example, AccountHistory) and appear on the record’s History related list, showing old value, new value, who changed it, and when.
Real-World Example
An admin at a distribution company couldn’t explain why discounts on Opportunities kept shifting. After enabling Field History Tracking on the discount and amount fields, every edit was logged with a name and timestamp. Within a week they identified a misconfigured approval process auto-applying discounts — a fix that would have been invisible without the trail.
Part 3: Extending Retention with Field Audit Trail (Salesforce Shield)
Standard Field History Tracking retains data for 18 months and caps at 20 fields per object — well short of what SOX or HIPAA require. This is where Field Audit Trail, part of Salesforce Shield, comes in.
Per Salesforce’s official Field Audit Trail documentation, Field Audit Trail lets you:
- Retain field history data indefinitely (commonly cited as up to 10 years, or longer via policy).
- Track up to 200 fields per object.
- Store archived history in the FieldHistoryArchive big object — which doesn’t count against your data storage limits.
How It Works
By default, Salesforce archives data after 18 months in production (and one month in sandboxes) and keeps it until you delete it. You define retention windows per object using the HistoryRetentionPolicy object, deployed via the Metadata API.
To check whether you already have it: go to Setup → Field History Tracking. If you see retention options beyond 18 months, Field Audit Trail is already enabled, per Flosum’s implementation guide.
Native vs. Shield: Quick Comparison
| Feature | Standard Tracking | Field Audit Trail (Shield) |
|---|
| Fields per object | 20 | 200 |
| Retention | 18 months | Up to 10 years / indefinite |
| Storage impact | Counts against limits | Doesn’t count |
| Best for | SMBs, basic tracking | Regulated, enterprise orgs |
Common Pitfalls (And How To Avoid Them)
Even experienced admins trip over these:
- Relying on the 20-entry UI view — you’re seeing a sliver of activity. Always export.
- Forgetting the 180-day cliff — set a recurring export calendar reminder or automation.
- No alerting — a log nobody reads isn’t security. Build Flow or SIEM notifications.
- Tracking too few fields — enable history on high-risk fields before an incident, not after.
- Assuming native tools meet compliance — they usually don’t for multi-year mandates.
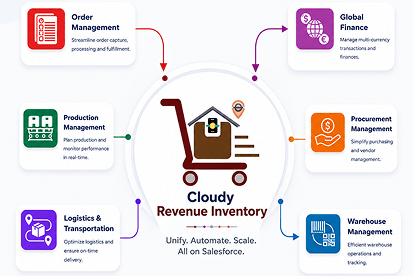
- Auditing across disconnected apps — every extra system is another place changes hide. Consolidating operations onto a unified ERP + CRM platform shrinks the surface area you have to monitor.
Key Takeaways
Setting up an audit trail in Salesforce comes down to combining the right tools and respecting their limits:
- Setup Audit Trail tracks configuration changes and is on by default — but purges after 180 days, so export weekly.
- Field History Tracking monitors up to 20 fields per object for 18 months.
- Field Audit Trail (Shield) extends this to 200 fields and up to 10 years for regulated orgs.
- Automate monitoring with the API, Flows, or a SIEM so your logs actually alert you.
- Match your retention to your regulations — SOX, HIPAA, and GDPR all outlast native defaults.
Knowing how to set up an audit trail in Salesforce transforms you from reactive firefighter to proactive guardian of your org. The fewer disconnected systems you run, the easier every change is to trace — which is exactly the visibility a single source of truth like Cloudy Business Ops 360 is built to deliver. Start with the native tools today, build your export routine this week, and layer on Shield when compliance demands it. The change someone makes tomorrow will already be waiting for you in the log.







 Salesforce ERP
 ERP + CRM Platform
  Inventory Management
  Warehouse Management
  Order Management
  Vendor Management
  Logistics Management
  BOM Management
  Order Fulfillment
  Business Operations
  SaaS Platform for Operations
  Salesforce Cloud ERP Platform
  Xero
Xero
 Zoho books
 Quickbooks
 Shopify
 Acumatica
 SAP
SAP
 Odoo
Odoo
 NetSuite
 Microsoft Dynamics 365
 Sage
Sage



 Agentforce Revenue Management
 Agentforce Revenue Management + Billing
  Salesforce CPQ
 Salesforce Advanced Billing
  Migrate from CPQ to Agentforce Revenue Management
  Microsoft
 Data Cloud
 Tableau
 ·
July 2, 2026
·
8 min read
·
July 2, 2026
·
8 min read