


 Post-Setup Requirement :
This application needs to be configured after Business Ops 360 package installation and before the end user begins using it through the user interface (UI).
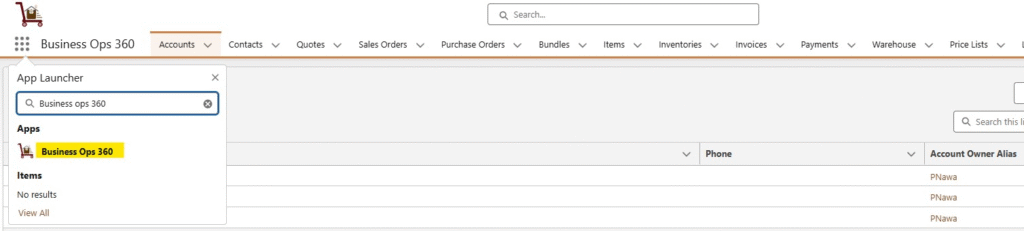
1. Search app :- Search for the “ Business Ops 360” in the app launchers search box.
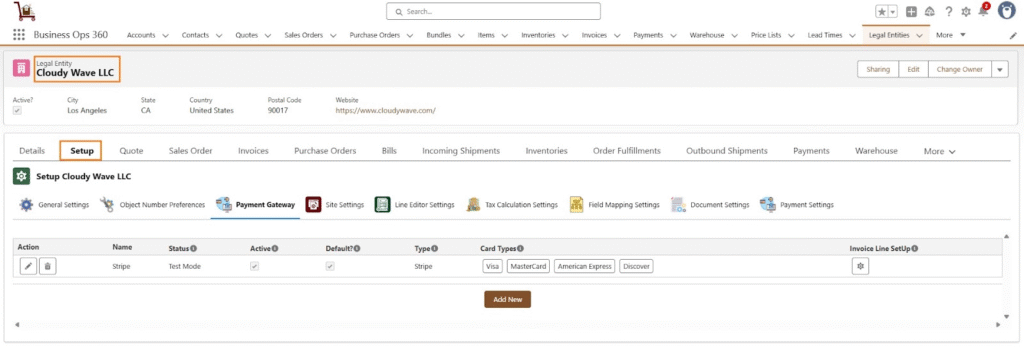
2. Create Legal Entity Record :- Select the “Legal Entities” tab to create a Legal Entity record. e.g. Cloudy Wave LLC.

3. Configure Payment Gateway – Click on Legal Entity Name & Select “Setup” tab. Now add Payment Gateway with Type, default, active, Payment Methods details by enabling Credit cards, ACH, Signature Options.
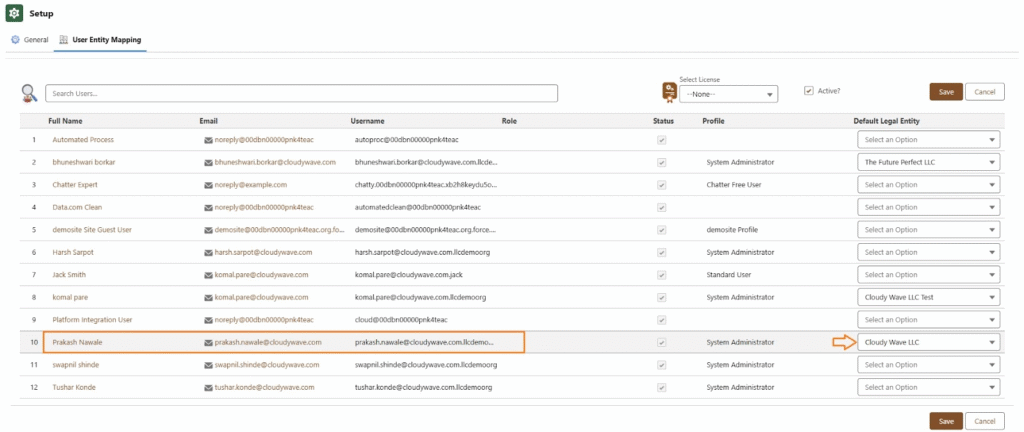
4. User Entity mapping : – Now, Legal Entity is mapping with the user by selecting Setup Tab & assign default Legal Entity to user & save.

Setup Layout:
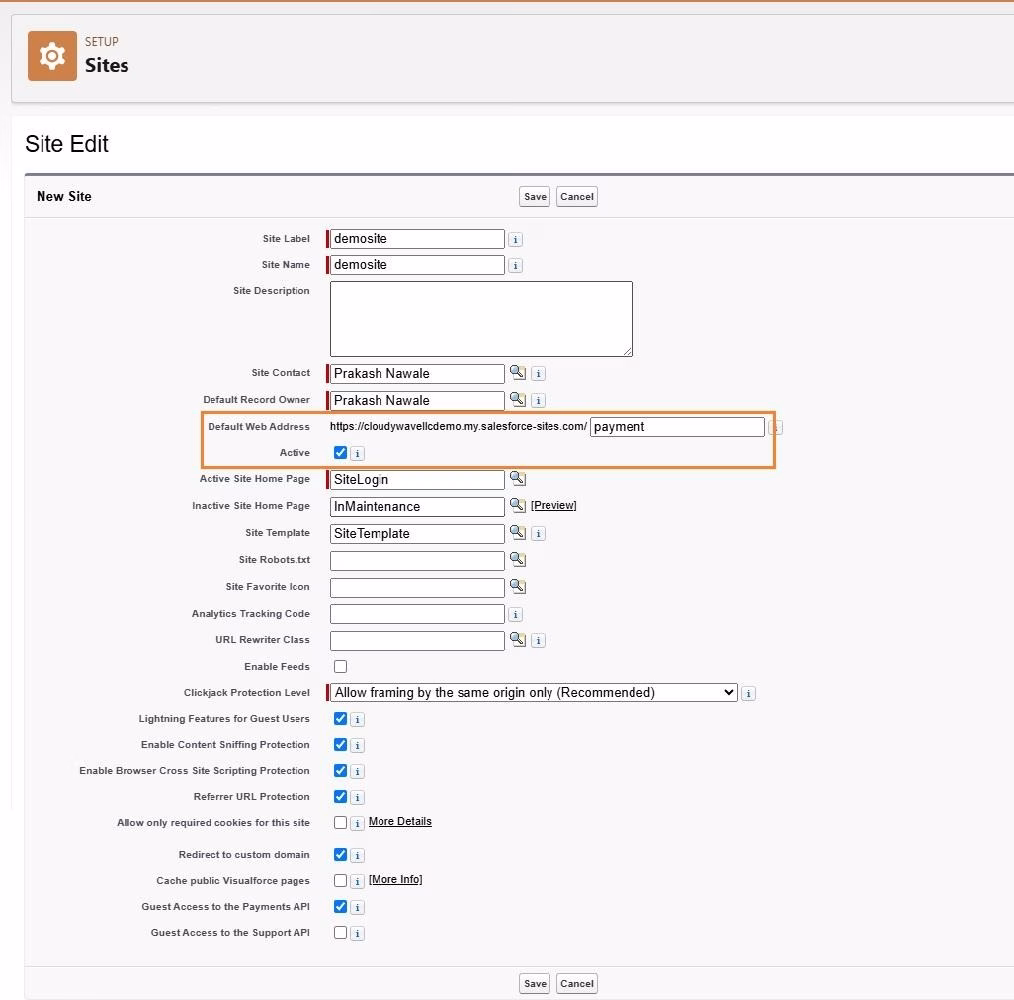
5. Site Setup : To set up a Site, click the Setup (gear icon) → type “Sites” in the Quick Find box → select Sites → click New, then enter the required site details.
6. Permission Set :- Create a standard user permission set & manage assignment.
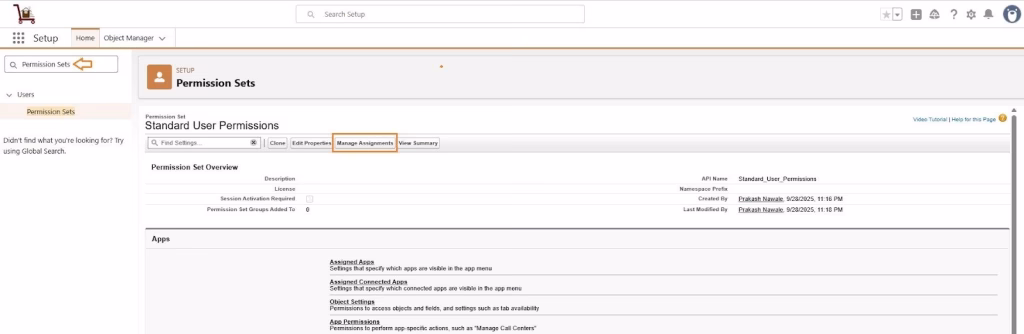
Now, need to manually select the Flow User Checkbox for the Standard User as follows,

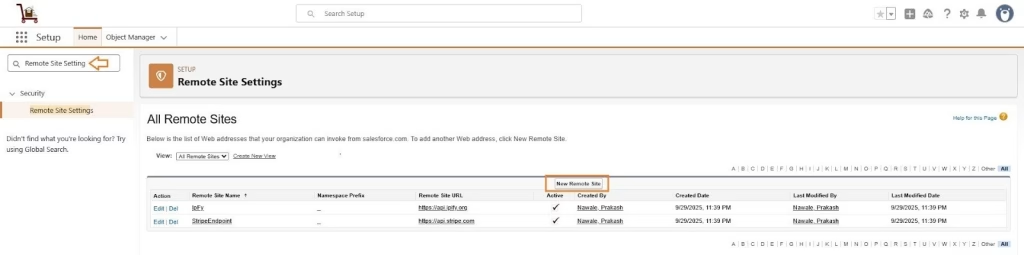
7. Remote Site Settings : Add below mentioned Remote Site Settings manually in org,
For Strip Payment – https://api.stripe.com
For Signature Evidence – https://api.ipify.org
To add Remote Site Setting, Click on Setup(gear icon) ⇒ type ‘Remote Site Setting’ in Quick Find ⇒ Select & Click to New Remote Site
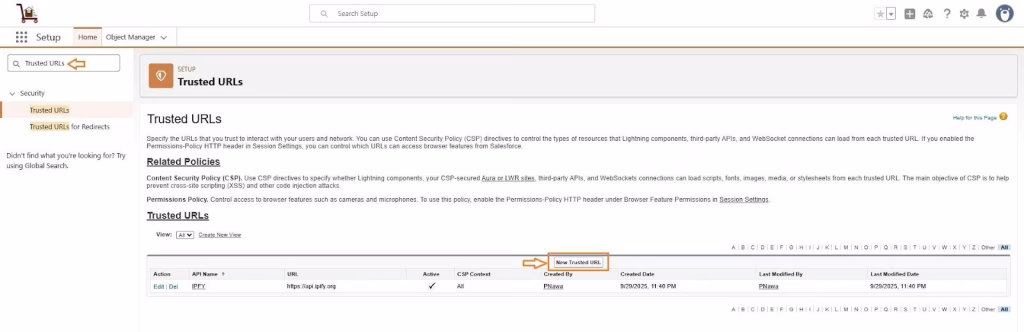
8. Trusted URL : Add below mentioned Trusted URL manually in org,
For Signature Evidence – https://api.ipify.org
To add Trusted URL, Click on Setup(gear icon) ⇒ type ‘Trusted URL’ in Quick Find ⇒ Select & Click to New Trusted URL