


 Sending Survey Invitations
The Survey module allows users to send survey invitations directly from the Survey record, without navigating to Contact or Account pages.
This makes it easy to distribute surveys to a specific audience using List Views and predefined recipient fields.
How to Send Survey Invitations (From the Survey Page)
Step 1: Open the Survey
- Navigate to the Surveys tab.
- Open the survey from which you want to send invitations.
- Click Create Survey Invitations (top-right button).
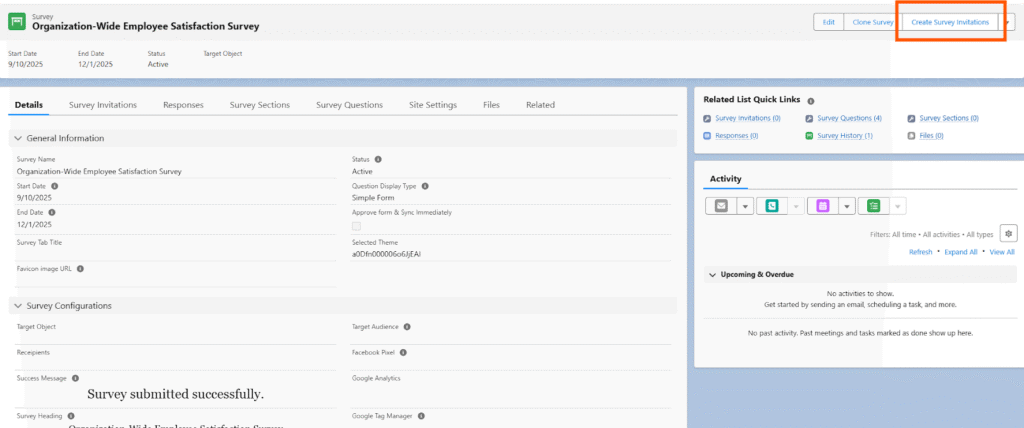
This opens the Survey Invitation modal.
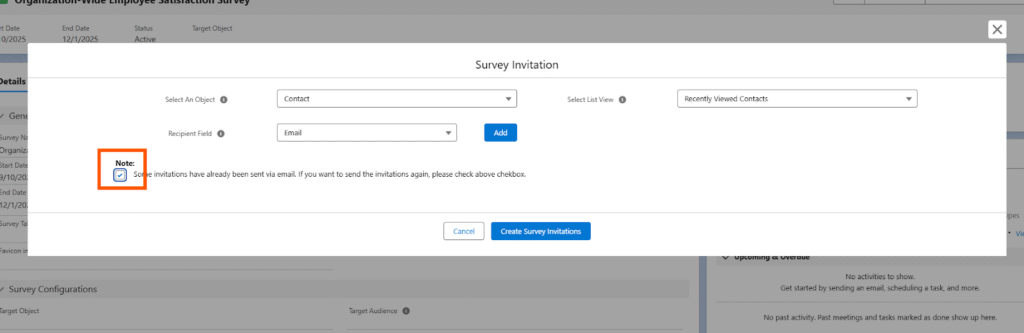
Step 2: Select an Object
The first field in the modal is Select an Object.
- This determines from which Salesforce object you want to pull your recipient records.
- Supported objects may include:
- Contact
- Account
- Custom Objects

Example:
If you select Contact, the system will only show Contact-related list views and Contact email fields.
Step 3: Select a List View
This field becomes enabled after selecting the object.
- Shows all list views available for the selected object.
- Helps filter the records to whom the survey should be sent.
If Object = Contact
You will see Contact-related list views like:
- Recently Viewed Contacts
- All Contacts
- My Contacts
- Custom List Views
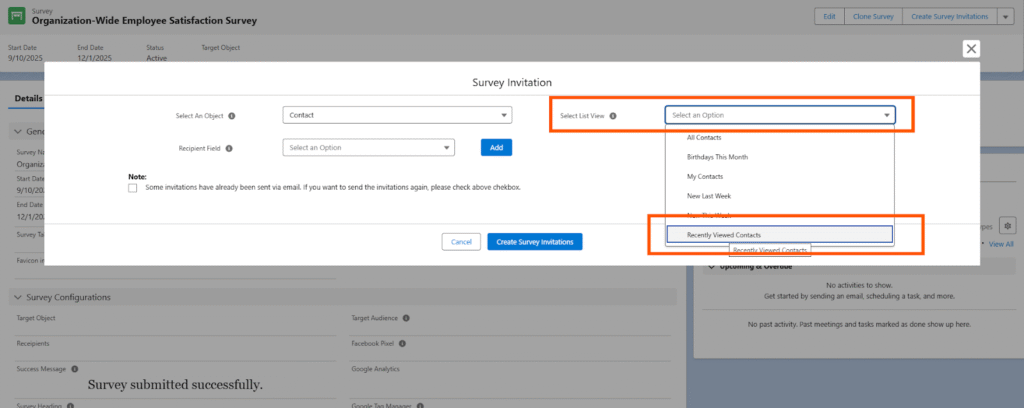
Select the list view containing the contacts you want to send the survey to.
Step 4: Select the Recipient Field
This field also becomes enabled after selecting the object.
- Determines which field contains the email address or recipient channel.
- Most commonly used field: Email
Examples
- Contact → Email
- Account → Email (if available)
- Custom Object → Email Field (if configured)
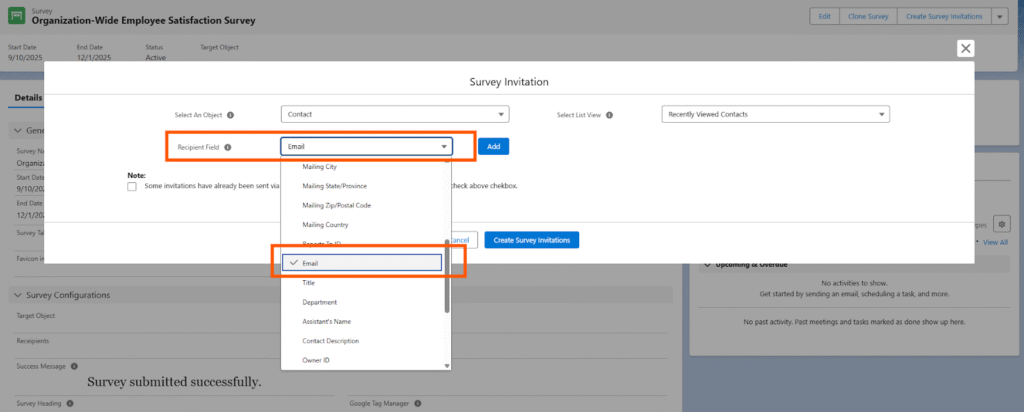
The invitation will be sent to the value stored in this field for every record in the selected list view.
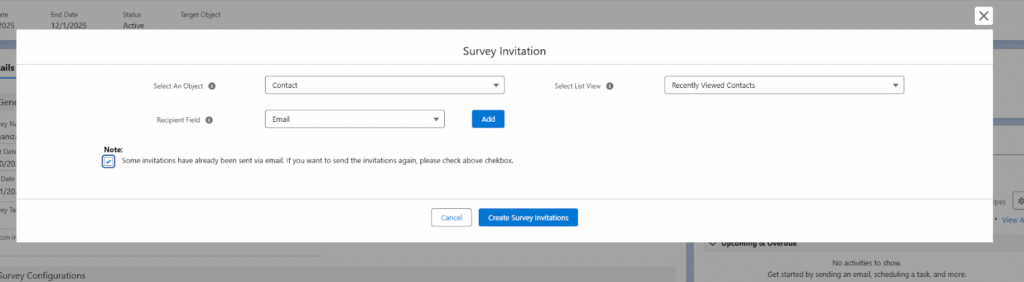
Step 5: Review the “Resend Invitations” Checkbox
A note and checkbox appear:
Note:
Some invitations have already been sent via email. If you want to send the invitations again, please check the above checkbox.
Meaning:
- If the system detects that some records in the selected list view were previously sent the same survey, it will warn you.
- To resend the survey invitation to them, the user MUST check this box.
Use Case:
- Useful when recipients missed the email
- Needed when you want to follow up or re-send reminders
- Prevents accidental duplicate emails
Step 6: Click “Create Survey Invitations”
Once all fields are selected:
- The system will generate survey invitation records.
- Emails will be sent to the selected recipients.
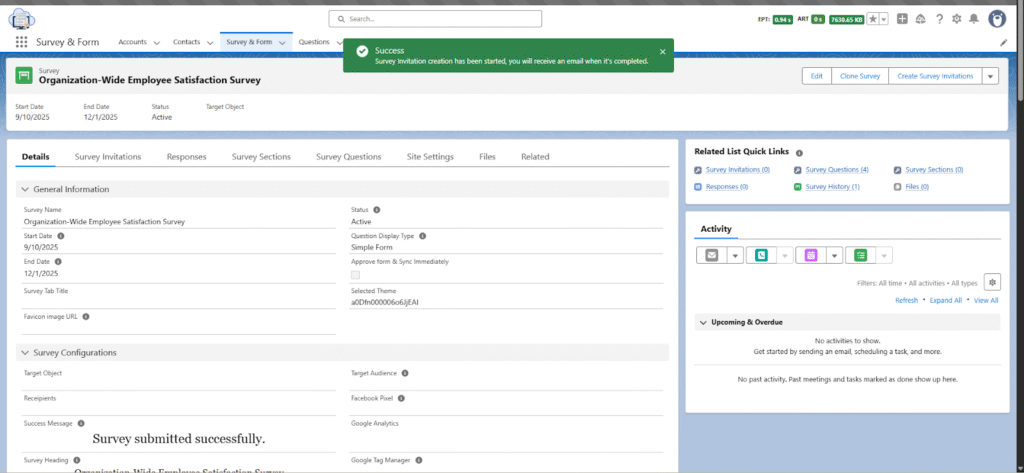
- You will see a confirmation message after successful processing.
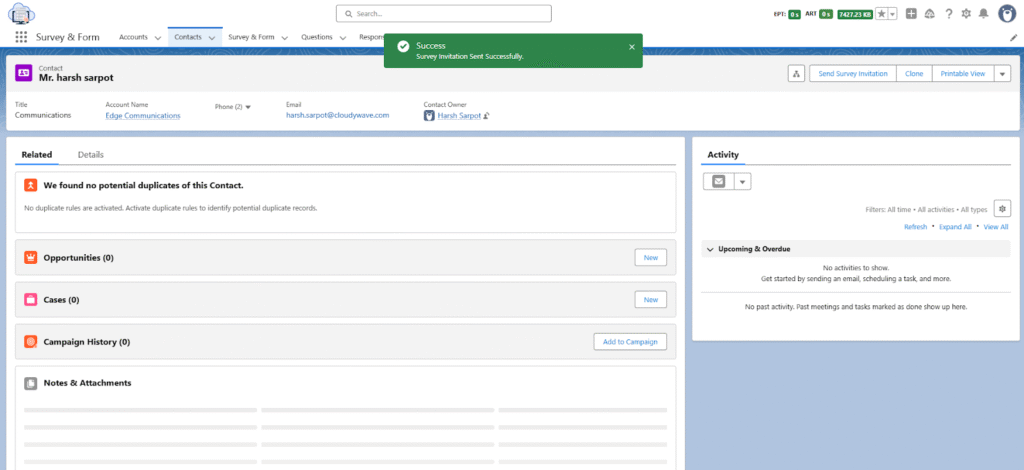
Sending Survey Invitations from a Contact Record
The system allows users to send survey invitations directly from an individual Contact record. This method is useful when you need to send a survey to a single person or review their details before sending.
How to Send a Survey Invitation from a Contact
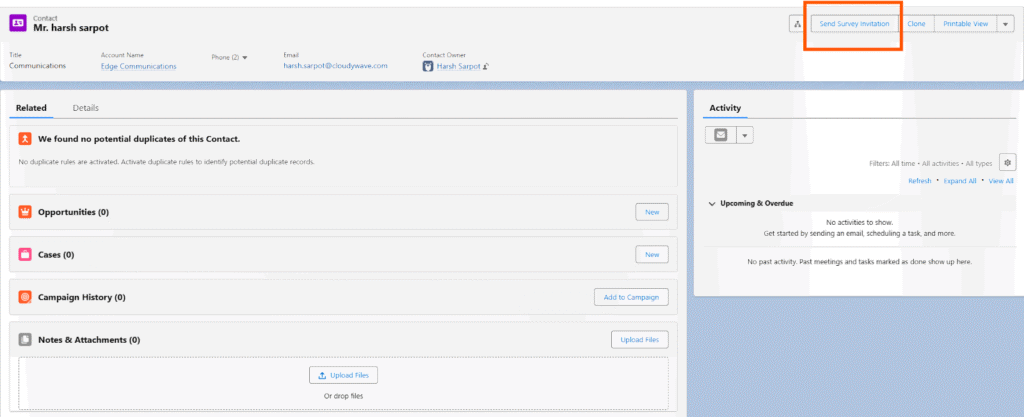
Step 1: Open the Contact Record
- Navigate to the Contacts tab.
- Open the specific contact to whom you want to send a survey.
- On the top-right of the page, click Send Survey Invitation.
This opens the Send Survey Invitation modal.
Step 2: Review Pre-Filled Details
When sending the survey from a Contact record:
Target Object is Automatically Selected
- The system auto-selects Contact as the target object.
- You cannot change this because you are sending the survey from a specific contact.
Recipient Field is Automatically Selected
- The Recipient Field is automatically set to Email.
- The survey invitation will be sent to the email address stored on the Contact record.
Only Active Surveys Are Shown
In the Select a Survey dropdown:
- You will only see surveys with Status = Active.
- Surveys that are Draft, Inactive, or Expired will NOT appear in the list.
This ensures invitations are only sent for valid, published surveys.
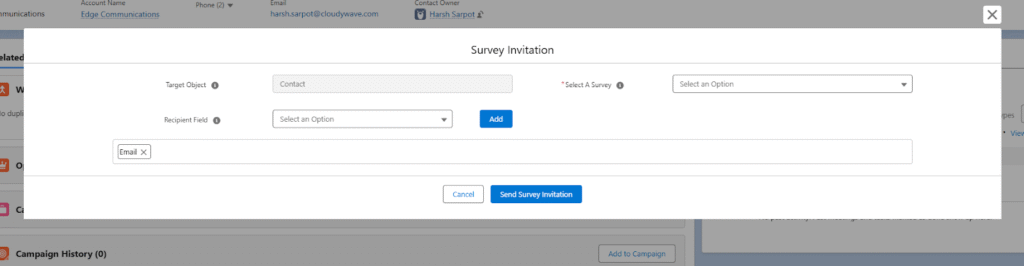
Step 3: Select the Survey
From the Select a Survey dropdown:
- Choose the active survey you want to send to this contact.
- Only active surveys will be visible.
If no surveys appear:
- Confirm that at least one survey is set to Active.

Step 4: Send the Invitation
- Once the survey is selected, click Send Survey Invitation.
- The system processes the request.
Success Message
After successful submission, you will see a confirmation banner indicating that the survey invitation has been created and sent.
Example:
“Survey invitation created successfully.”