Incoming Shipment
An Incoming Shipment represents a delivery of goods or materials coming into your organization — either from a vendor (based on a Purchase Order) or as returned goods from a customer (Sales Return).
In Cloudy Business Ops 360, the Incoming Shipment record acts as a tracking entity that helps you plan for inventory updates, warehouse operations, and receiving activities.
Why Incoming Shipments Are Important
- Streamline Receiving Process – Know when goods are expected and prepare warehouse resources.
- Improve Inventory Accuracy – Update stock levels as soon as shipments are received.
- Enhance Visibility – Track open shipments and their status in real time.
- Support Returns Management – Handle incoming customer returns efficiently.
How Incoming Shipments Work in Cloudy Business Ops 360
- Creation
- System-generated when a Purchase Order is confirmed and goods are expected.
- Can also be manually created for ad-hoc shipments or customer returns.
- System-generated when a Purchase Order is confirmed and goods are expected.
- Tracking & Planning
- Warehouse managers use Expected Delivery Date to schedule unloading and inspection resources.
- Status and checkboxes (Received?, Partial Delivery?) are updated as the shipment progresses.
- Warehouse managers use Expected Delivery Date to schedule unloading and inspection resources.
- Receiving Process
- Once goods arrive, check Received? or Partial Delivery? to reflect the status.
- If damaged items are found, mark Damaged Goods? and record discrepancy for vendor follow-up.
- Inventory is updated automatically when marked as Received.
- Once goods arrive, check Received? or Partial Delivery? to reflect the status.
Best Practices
- Keep Status & Checkboxes Updated – Ensures visibility for procurement, warehouse, and finance teams.
- Use Partial Delivery Checkbox – Helps track pending quantities still in transit.
- Perform Quality Check – Mark Quality Check Done? only after inspection is complete.
- Monitor Damaged Goods – Keep accurate records to claim vendor credits or initiate returns.
Incoming Shipment Creation
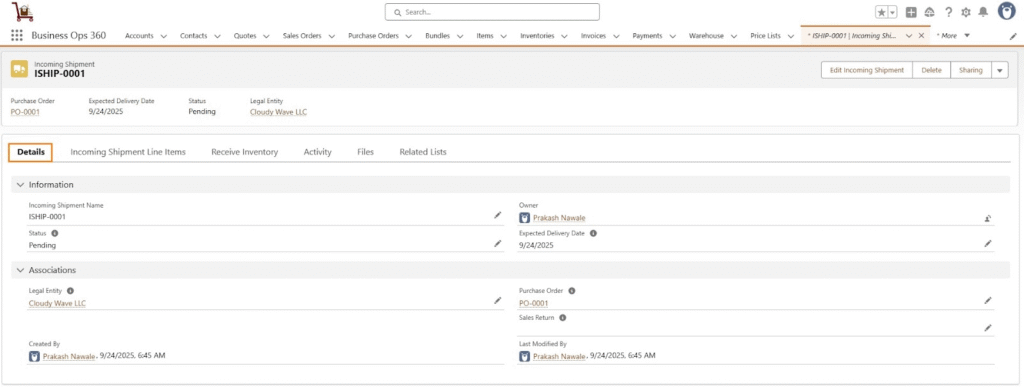
After creating the purchase order, users can proceed with Incoming Shipment Creation.
In this step, the user selects the relevant Warehouse Name where the goods will be received. Afterward, the quantity of items received from the vendor is entered into the system. This feature ensures accurate tracking of incoming inventory and helps update stock levels in real time.
Click the ‘Create Incoming Shipment‘ button on the Purchase Order record.

After clicking the ‘Create Incoming Shipment‘ button, all related fields are automatically populated in the Incoming Shipment. Add the remaining field details like ‘Select a Warehouse’.
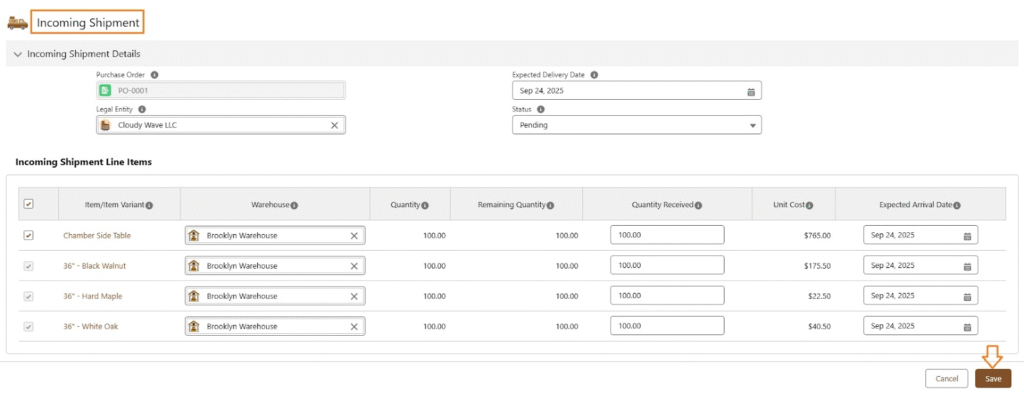
Click Save to create Incoming Shipment.
Incoming Shipment Layout:
Receive Inventory
After completing the purchase order and incoming shipment, users can proceed with Receive Inventory. In this step, users can allocate the received quantity to specific bins within the warehouse. Additionally, the system allows selecting multiple warehouses at the same time, enabling users to distribute the received inventory across different locations as needed.
Select “Receive Inventory” tab on Incoming Shipment record.
After clicking the ‘Receive Inventory‘ button, select the ‘Storage Bins‘ checkbox to allocate the received quantity to specific bins within the warehouse. Once the checkbox is selected, the Incoming Shipment status automatically updates to ‘Completed’.
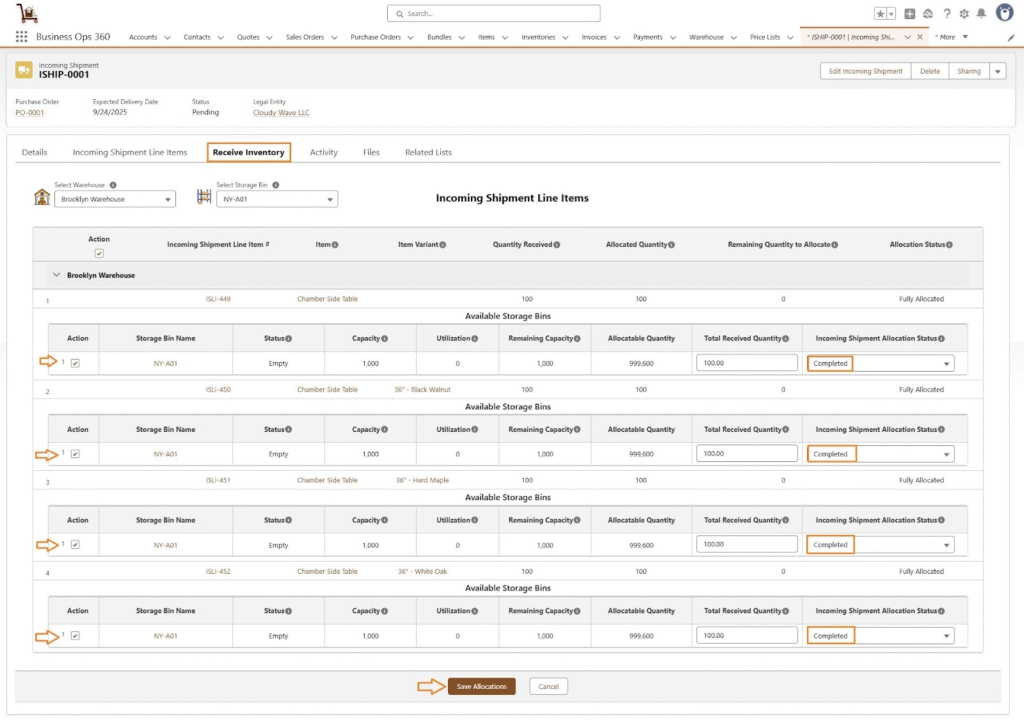
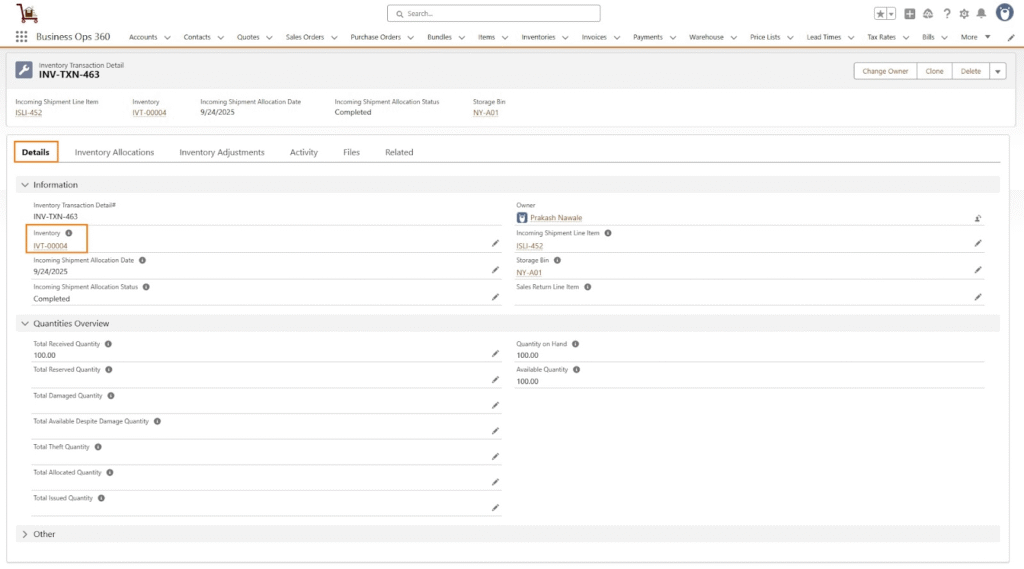
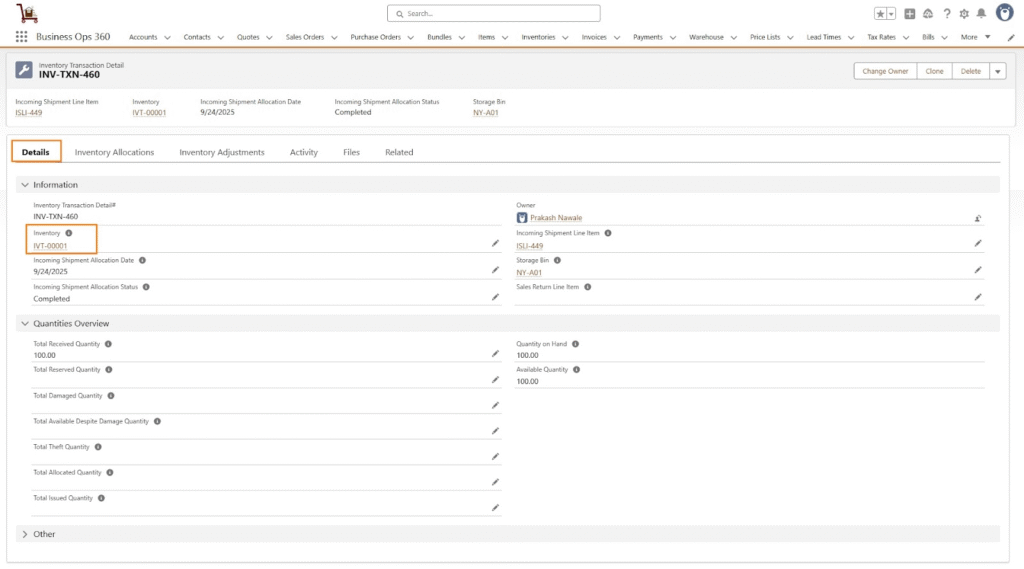
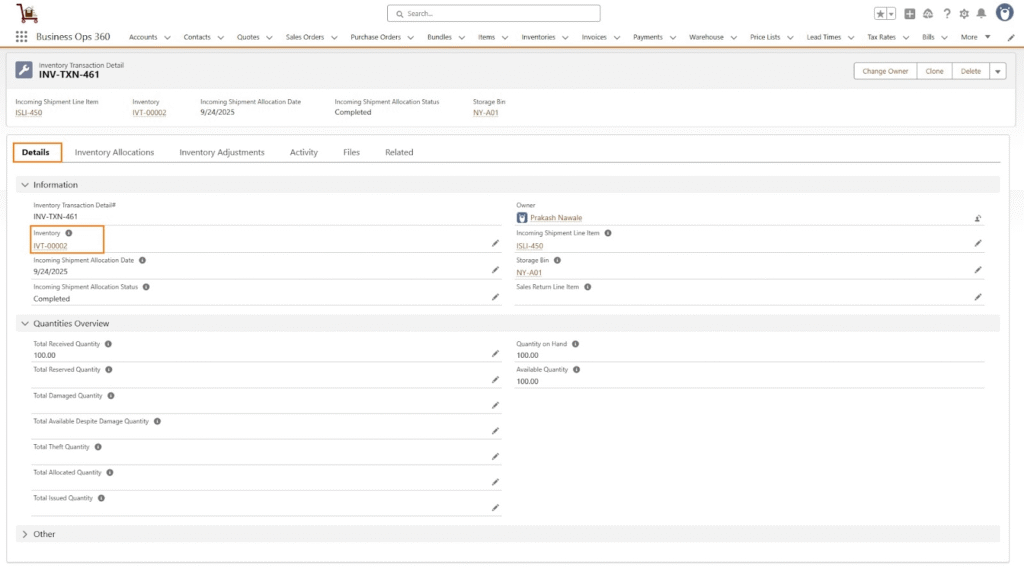
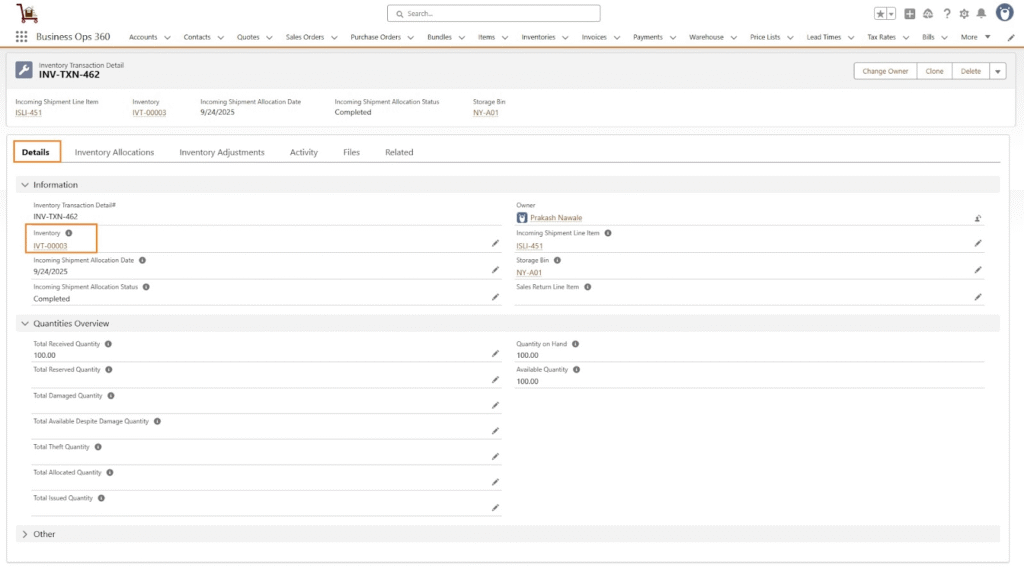
Click Save Allocations. After this, Inventories created with Inventory Transaction Details.
Inventories Layout

IVT-00001
Inventory Transaction Detail

IVT-00002
Inventory Transaction Detail
IVT-00003
Inventory Transaction Detail
IVT-00004
Inventory Transaction Detail
